Hyperbole and a Half pain scale: Every level + free template
The Hyperbole and a Half pain scale is Allie Brosh’s humorous pain chart, ...

1
Last Updated: Oct 5, 2026

The AC resisted extension test provokes the acromioclavicular joint to localize shoulder pain.
A positive test reproduces sharp, well-localized pain on top of the shoulder at the AC joint.
Published research (Chronopoulos et al.) reports 72% sensitivity and 85% specificity, so the test earns its value inside an AC joint provocation cluster rather than on its own.
The free template records positioning, the resisted-abduction finding, the cluster result, and pain scores in one place, so every AC joint assessment is charted the same way.
A standardized assessment template for physical therapists and musculoskeletal clinicians. It guides patient positioning, examiner technique, positive-finding documentation, and systematic recording of AC joint assessment results.
Download templateMost guides to the AC resisted extension test stop at the single maneuver. But a positive result only becomes a confident call when you read it alongside the rest of the acromioclavicular joint provocation cluster and record the whole set the same way every time.
This guide is built for physical therapy practices and covers the correct technique, how to interpret a positive finding, the published diagnostic accuracy, and the sibling tests you should run with it, using the downloadable template above.
The AC resisted extension test is a clinical assessment used to evaluate acromioclavicular (AC) joint dysfunction and injury. The AC joint is the articulation between the distal clavicle and the acromion of the scapula, at the very top of the shoulder.
It is a common source of pain in athletes, in people with repetitive overhead loads, and after a direct fall onto the shoulder. This special test applies resistance in a set position to provoke a symptomatic AC joint.
With the shoulder held at 90 degrees of flexion and internal rotation, the patient pushes the arm outward against the examiner’s hand. Pain localized to the AC joint during that resisted movement is a positive finding, pointing to AC joint pathology such as osteoarthritis, an AC joint separation, or a sprain — the sibling tests below help confirm which.

Correct technique is what separates a true AC joint finding from a false positive. Follow these steps to perform the AC resisted extension test reliably:
The two things that decide accuracy are the starting position and the direction of resistance. Resisting into horizontal abduction with the shoulder internally rotated loads the AC joint; letting the shoulder drift into pure adduction turns it into a different test. Pairing the maneuver with standardized note-taking keeps it reproducible from one session to the next.
A positive AC resisted extension test reproduces pain localized specifically to the AC joint during resisted horizontal abduction. The pain should be sharp and well-localized, not diffuse shoulder ache.
Supporting positive findings include:
A positive test points to AC joint pathology, typically osteoarthritis, post-separation change, or an acute AC joint sprain. It should never stand alone. Clinical assessment combines this test with palpation, the sibling AC joint special tests below, and imaging when indicated. Its diagnostic value climbs sharply when it is read as one result inside an AC joint test cluster.
Turning this scale into a digital form with form capture software removes double entry and keeps every score legible.
The most commonly cited sensitivity and specificity figures for the AC resisted extension test come from Chronopoulos et al. (2004), who assessed physical tests for isolated chronic acromioclavicular lesions. The likelihood ratios below are commonly cited alongside these figures. These numbers guide how much weight to give a positive or negative result:
These figures show good specificity with moderate sensitivity. A positive test is fairly convincing for AC joint involvement, while a negative test lowers the odds without clearing the joint outright. The test performs best alongside clinical examination, patient history.
No single AC joint special test is accurate enough to diagnose on its own, which is why clinicians run them as a cluster. Combining two or three provocation tests, plus palpation for AC joint line tenderness, raises diagnostic confidence more than any one result.
Published clusters (such as those described by Krill and by Chronopoulos) pair the resisted extension test with the tests below. Here is how each one loads the joint differently:
With the patient seated, passively bring the arm across the body into horizontal adduction while supporting the elbow, so the shoulder folds toward the opposite side like a scarf. Pain at the AC joint is a positive sign.
Sometimes listed as the AC crossover test, the cross-body adduction test compresses the joint, so it complements the resisted extension test, which loads it in tension. This test is easy to document alongside the others.
The Paxinos sign is a manual AC compression test. Place your thumb under the posterolateral acromion and the index and middle fingers of the same hand on the mid-clavicle, then squeeze by pushing the thumb up and the fingers down.
Pain at the AC joint is a positive Paxinos test, which makes it a useful pressure-based counterpart to the resisted extension test.
Cup your interlocked hands over the shoulder, one heel on the spine of the scapula and the other on the clavicle, then squeeze your hands together to shear the AC joint. Pain or abnormal movement is a positive AC shear test, pointing to AC joint laxity or arthritis.
Because it stresses the joint through compression and shear rather than resisted motion, it adds a distinct data point to the cluster.
Position the shoulder at 90 degrees of flexion with about 10 to 15 degrees of horizontal adduction and full internal rotation, so the thumb points down. Ask the patient to resist a downward force, then repeat with the palm up.
In the active compression test, pain or clicking felt on top of the shoulder that eases when the palm is supinated suggests AC joint involvement (deeper pain can indicate a labral problem instead). It is the highest-volume search of the sibling tests, so patients and students often look it up by name.
A couple of others round out the picture. An AC traction test (also called the horizontal arm traction test) applies downward pull to the hanging arm and looks for a visible step or reproduced pain, which points to instability rather than arthritis.
AC joint line tenderness on palpation is the simplest screen of all and should anchor the cluster. Recording which tests you ran, and their results, is what turns a handful of maneuvers into a defensible AC joint test cluster.
Systematic documentation. When you record an AC resisted extension test, and the rest of the cluster, capture:
Practice management software like Pabau lets you store the assessment template and link it straight to the patient record, so longitudinal tracking of AC joint findings takes no extra admin. Consistent records also support audit trails and continuity when more than one clinician sees the same patient. A structured client record keeps every AC joint pain test in one timeline. Practices billing this assessment during a visit should also check current physical therapy billing rules for the CPT code used.

Combine the AC resisted extension test with these practices to sharpen your assessment:
Recording findings immediately after the assessment keeps them accurate and cuts documentation lag.

A positive AC resisted extension test warrants imaging when clinical suspicion is high. Consider an X-ray, ultrasound, or MRI referral when:
Early imaging guides treatment and rules out other pathology.
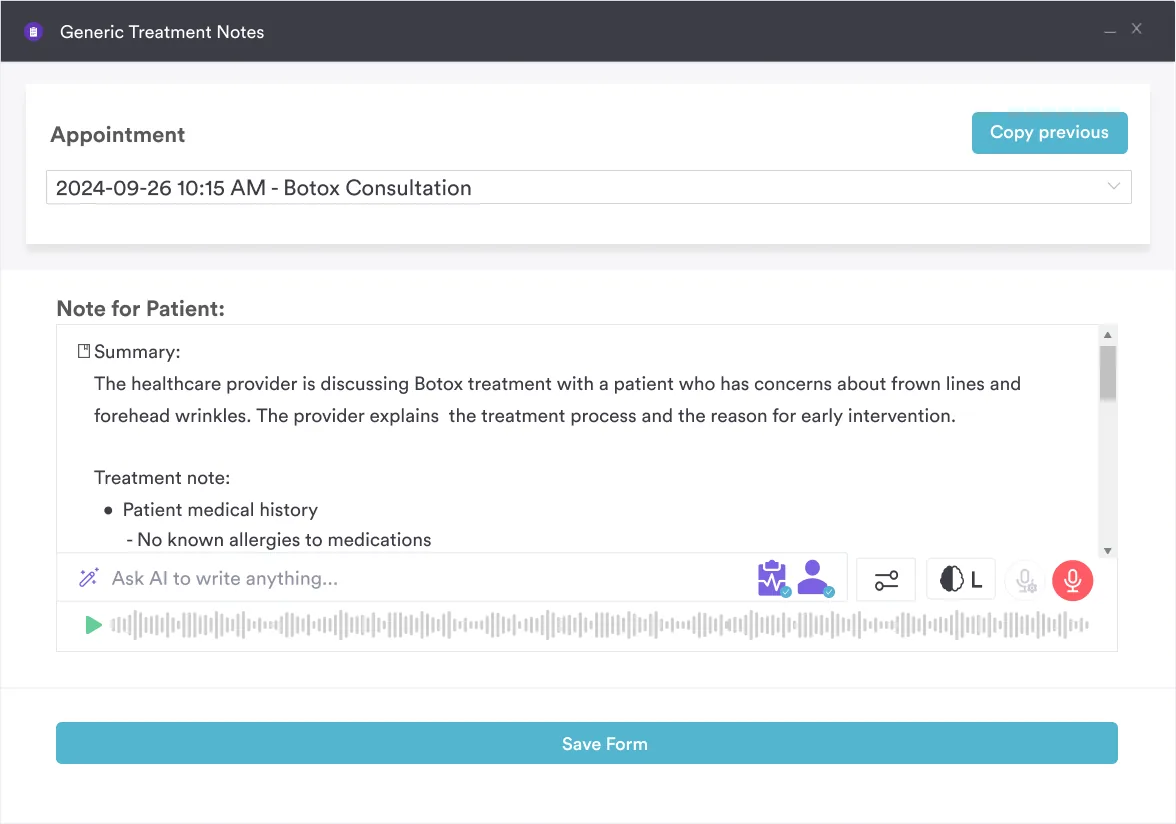

Record AC joint and shoulder special tests systematically. Pabau’s integrated template system helps physiotherapists and clinicians document findings, track outcomes, and comply with professional standards.

The AC resisted extension test is a quick, informative screen for acromioclavicular joint dysfunction. Good specificity, moderate sensitivity, and an easy setup make it a staple of shoulder assessment, provided you get the positioning and resistance direction right. It becomes most useful when you read it inside the AC joint provocation cluster rather than alone.
Using the template keeps every AC joint assessment recorded the same way, which supports evidence-based decisions and clean handovers between clinicians. See how Pabau supports streamlined clinical documentation and keeps your special-test findings in one patient record.

Need an anatomy refresher for pelvic assessments? male pelvis anatomy covers the bones, muscles, and organs that shape pelvic exam findings and clinical relevance.
Need a template for upper-limb functional assessment? The Action Research Arm Test gives you a structured way to score arm and hand function alongside your shoulder special tests.
Ready to clear an ankle sprain? proprioception test guide covers the validated methods, procedures, and interpretation that separate structural healing from sensorimotor readiness.
A positive AC resisted extension test reproduces pain localized to the acromioclavicular joint during resisted horizontal abduction at 90 degrees of shoulder flexion. It points to AC joint pathology such as osteoarthritis, separation, or a sprain. Confirm it with palpation, the other AC joint special tests, patient history, and imaging before settling on a diagnosis.
The AC resisted extension test loads the joint by resisting horizontal abduction at 90 degrees of shoulder flexion, while the cross-body adduction (scarf) test compresses it by passively pulling the arm across the body. They stress the AC joint in opposite directions, so running both gives you a more rounded read than either alone.
Published research (Chronopoulos et al., 2004) reports about 72% sensitivity and 85% specificity for the AC resisted extension test. A positive likelihood ratio near 4.8 is commonly cited alongside these figures. In practice, a positive result is fairly convincing while a negative one does not clear the joint, which is why the test works best as part of a cluster.
Refer for imaging when several AC joint tests are positive together, palpation reproduces sharp AC joint pain, the patient has a history of direct shoulder trauma, or symptoms persist beyond 4 to 6 weeks of conservative treatment. An X-ray or ultrasound helps confirm AC joint osteoarthritis or structural damage and guides the treatment plan.
No. It is a useful screen, but it should never diagnose on its own. Read it alongside the cross-body adduction test, Paxinos sign, AC shear test, AC joint palpation, patient history, and imaging to build a complete picture and confirm AC joint pathology with confidence.
Subacromial impingement, rotator cuff tears, biceps tendinopathy, and pain referred from the neck can all mimic AC joint pain, because they share the top-of-shoulder region. Clustering the resisted extension test with cross-body adduction and O’Brien’s active compression test, then confirming with pinpoint palpation, helps separate true AC joint pain from these look-alikes.
Screen for AC joint arthritis by combining AC joint line palpation with the resisted extension test, the cross-body adduction test, and the AC shear test. A cluster of positive provocation tests, together with radiographic joint-space narrowing or osteophytes on X-ray, supports a diagnosis of AC joint osteoarthritis.