Personal value assessment
A personal value assessment is a structured self-reflection exercise that helps ...

Last Updated: Oct 20, 2026

The ADA dental claim form is the standard document US dental practices use to bill insurance payers.
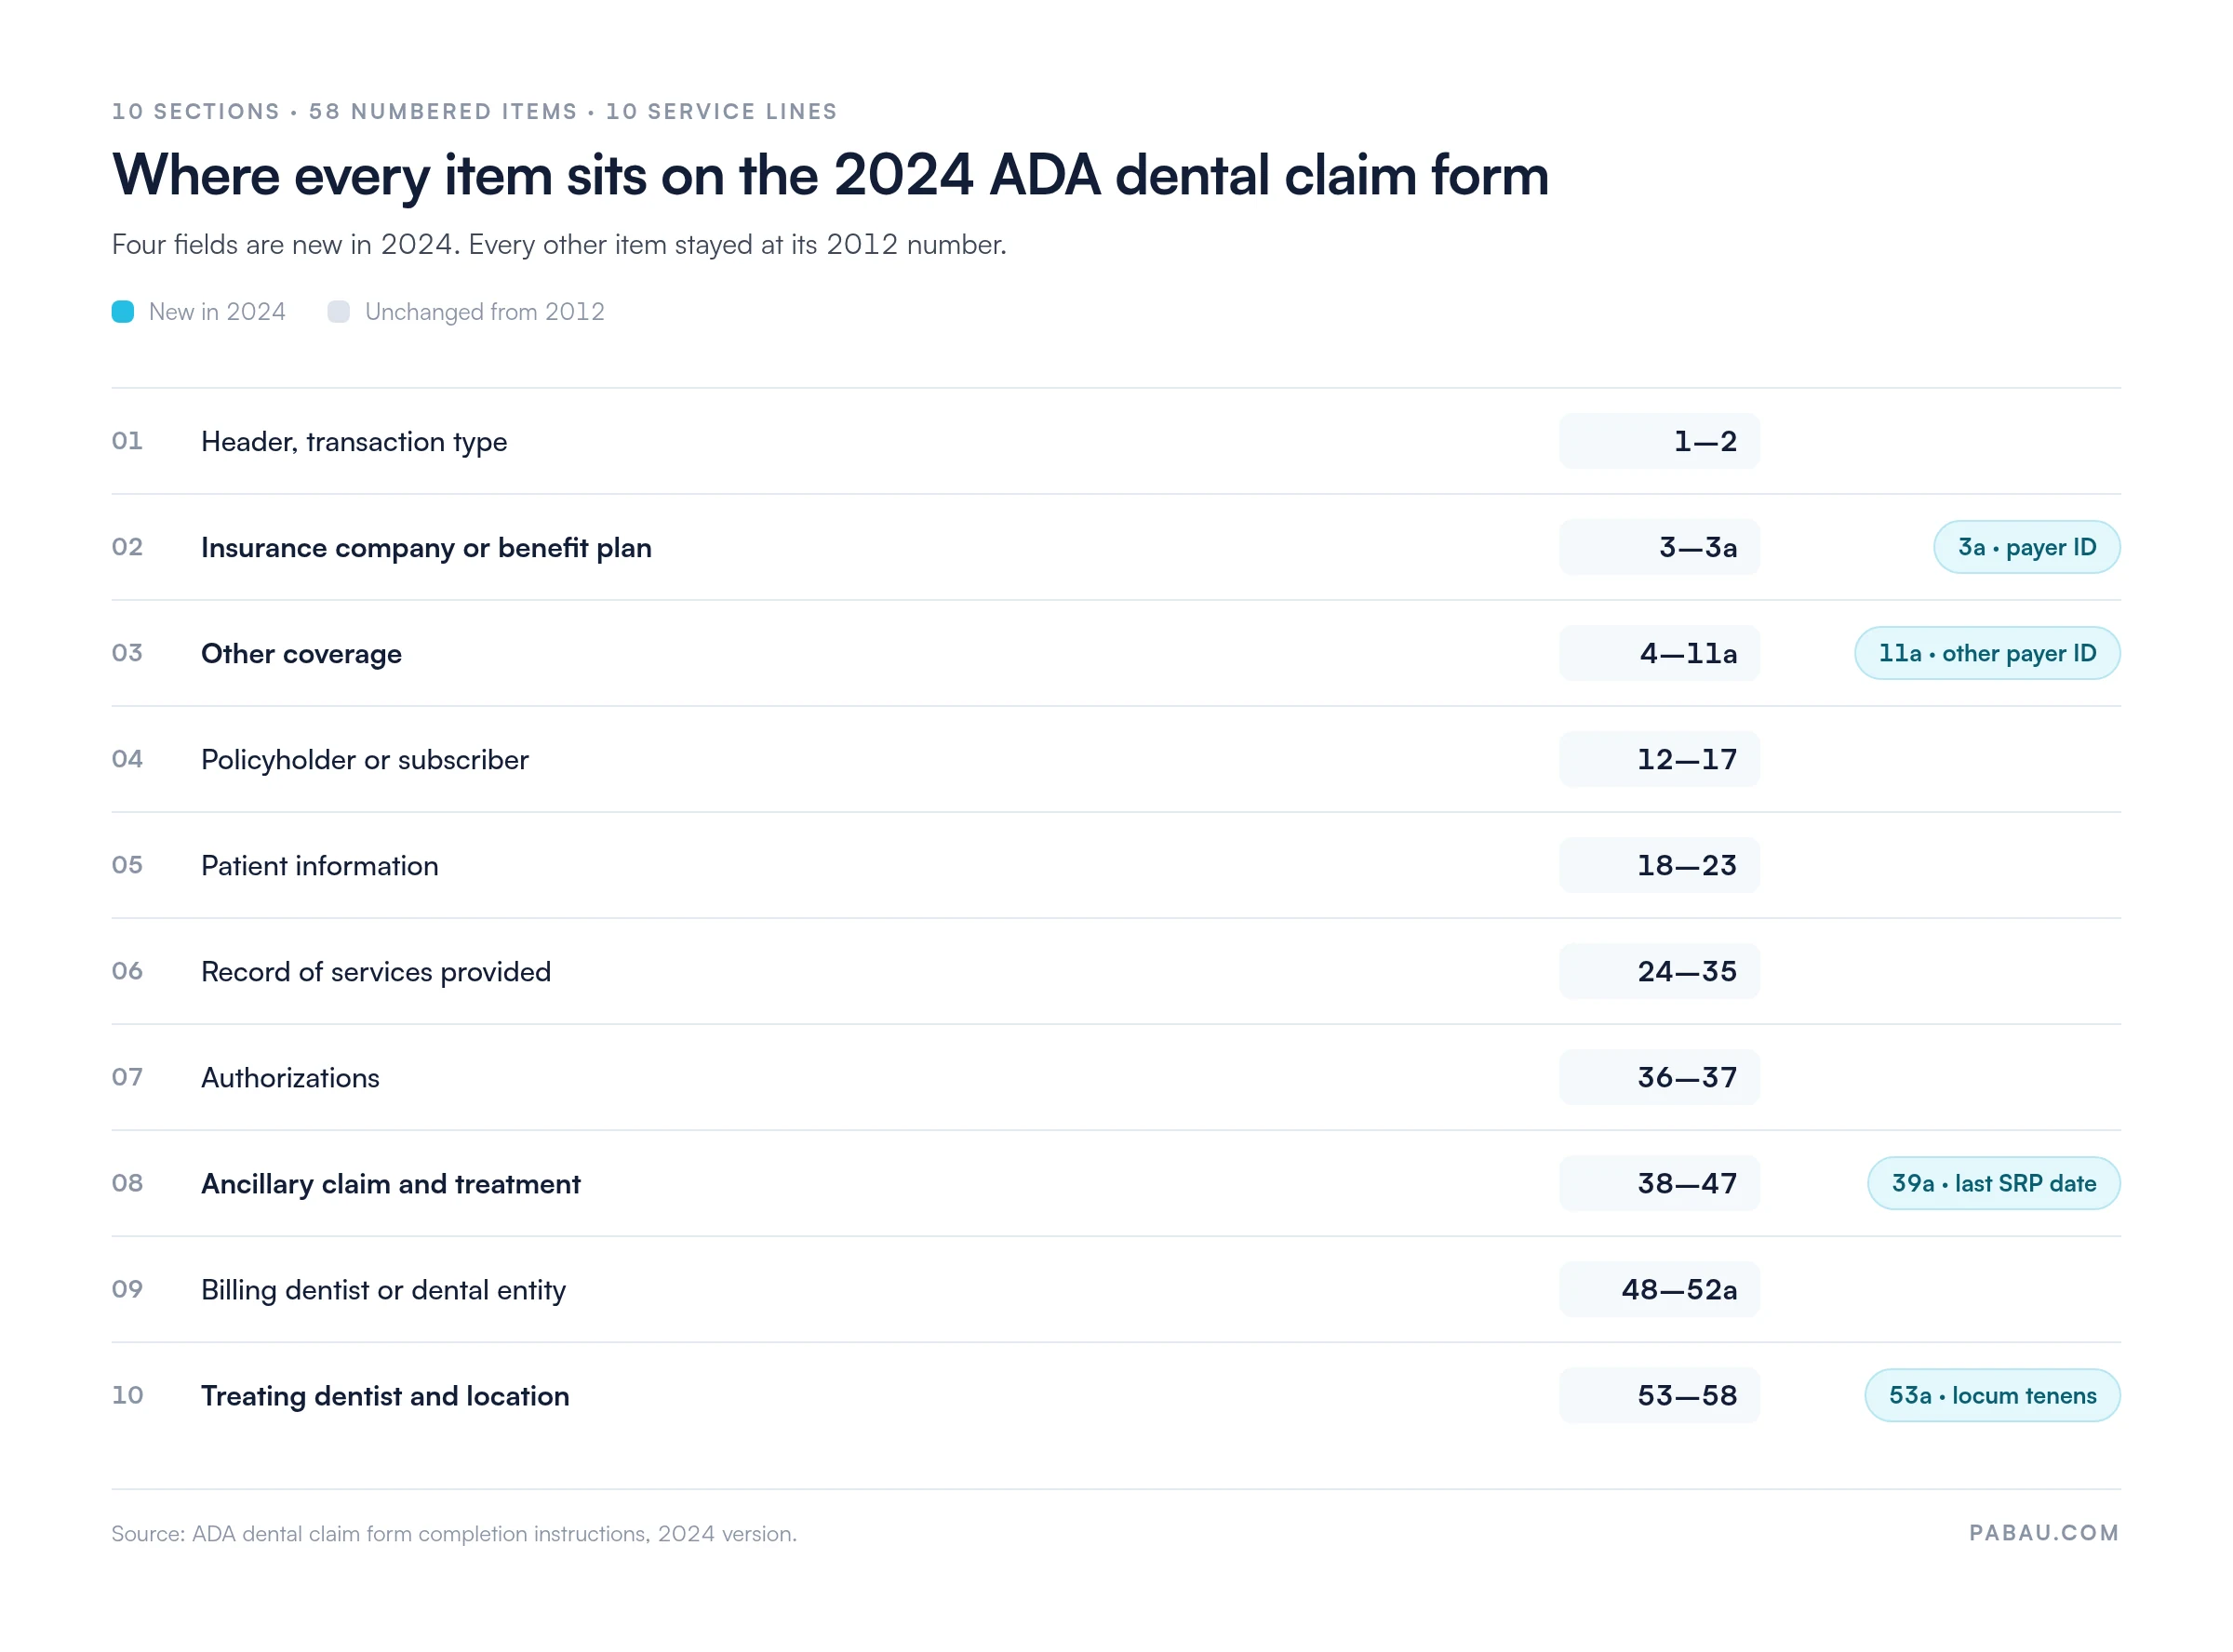
Version 2024 adds a locum tenens checkbox at item 53a, a last-SRP date at 39a, and payer IDs at 3a and 11a.
The layout did not change, so the form still runs 10 sections, 58 numbered items and 10 service lines.
Coordination of benefits and orthodontic reporting already existed on the 2012 form, so neither is a 2024 addition.
Practice management software like Pabau builds the claim from the treatment note, so codes and item entries stay consistent.
A one-page patient intake and consent sheet that captures the details every dental claim depends on. It covers patient identifiers, contact and emergency contacts, reason for the visit, history, medications, consent sign-off, and an office-use block.
Download templateDental claims get denied for small, mechanical reasons. A transposed NPI digit, a tooth number that contradicts the procedure code, or a missing payer ID sends the claim straight back unpaid.
The ADA Dental Claim Form is the paper standard behind those submissions, and version 2024 is the current one. Four data items were added, two sets of instructions were corrected, and the rest of the form stayed exactly where it was.
This guide walks the 2024 form section by section and separates the genuine changes from the misreported ones. It also covers the errors that trigger denials, and weighs paper against electronic submission so you can decide which fits your practice.
The ADA dental claim form is the standardized document dental practices submit to insurance payers to request payment for treatment. Published by the American Dental Association (ADA), it captures patient information, treatment detail and provider credentials in a format every major US dental insurer accepts.
Practices complete the form after treatment to document what was delivered, and to which tooth or surface. Each service line also carries the Current Dental Terminology (CDT) procedure code and the fee charged. The payer then checks the claim against the patient’s coverage limits and exclusions, and issues payment or a denial explanation.
Without a standardized form, payers have no consistent way to read a claim. That means delays, requests for more information, and denials. The form is to dental billing what the superbill is to medical coding, and it is the paper trail that justifies reimbursement.
The ADA owns and copyrights the form, so printed pads and licensed electronic versions come from the ADA Catalog or from your practice management vendor. The template above is a companion intake sheet for your front desk, not a substitute for the official form.
The 2024 version adds four new data fields and corrects two sets of completion instructions. Everything else is unchanged. The additions let practices report a substitute dentist and record the date of a patient’s last scaling and root planing. They also carry payer ID codes for the primary plan and for any other coverage.
Several claims about the 2024 form circulate widely in billing guides, and none of them survive a read of the ADA’s own completion instructions. If you are training staff on the new version, correct these first.
The form still runs 10 sections and 58 numbered items. If your team knew where a field lived on the 2012 form, it sits in the same place on the 2024 version.
Payers set their own transition dates for a new form version, and several issued provider guidance when this one appeared in early 2024. Use the current version for new claims, and check the payer’s provider bulletin before you order a batch of printed forms.
Completing the form accurately is the single highest-leverage step in the billing cycle. The form groups related items together, so working through them in order is the fastest way to avoid an omission.
The map below shows which item numbers belong to each section, and where the four 2024 additions land.
Any dental practice that accepts insurance uses this form. That covers general dentistry offices, orthodontic practices, periodontal specialists, endodontists, prosthodontists and pediatric dental practices. It is the standard across the US dental benefits system.
An orthodontic practice filling item 41 needs the appliance placement date. When the retainer is made on site, the in-house appliance record dates that work and links it to the treatment plan.
Solo practitioners, multi-dentist groups, dental school clinics and federally qualified health centers all work from the same 58 items. The more payers a practice bills, the more the standardized layout pays for itself.
Faster payment: A complete, correctly coded clean claim moves through adjudication without a human touching it. An incomplete one waits in a queue for someone to request the missing detail.
Fewer denials: Errors in patient identifiers, provider NPI or procedure code trigger automatic rejections. A clean form clears the payer’s front-end validation on the first pass.
Audit readiness: Payer audits ask for proof that services were delivered and coded correctly. The claim form is the first document requested, and it has to match your clinical record and your fee schedule.
Compliance: HIPAA governs how patient information is handled and transmitted. The standardized form separates data cleanly and carries explicit authorization boxes, which ad hoc letters and spreadsheets do not.
Dental claims fail for predictable reasons. Working through this list with your billing team cuts the denial rate quickly:
Most of these start at the front desk rather than in billing. Running a dental insurance verification form before treatment catches a stale plan or a missing payer ID early.
Audit your claim submissions quarterly. Pull 20 random claims from the past month and check each one against the patient record. Names should match, tooth numbers should be right, and CDT codes should match the treatment delivered. Fees should match your schedule. One audit catches a systemic error, such as a transposed payer ID, before it produces a hundred denials.
Submit electronically, and keep paper only for the handful of payers that still require it. The ADA keeps the data content of the two versions in step, so nothing is lost either way. The trade-off is easier to see side by side.
Electronic submission uses the EDI 837D transaction, the HIPAA standard for dental claims. It plugs straight into dental billing software, so the detail you captured in the chart carries over without a second round of typing.
Dental teams type the same patient details twice. Once into the chart, and again into the claim. Every re-key is a chance to transpose a subscriber ID or drop a tooth surface, and the payer only tells you weeks later.
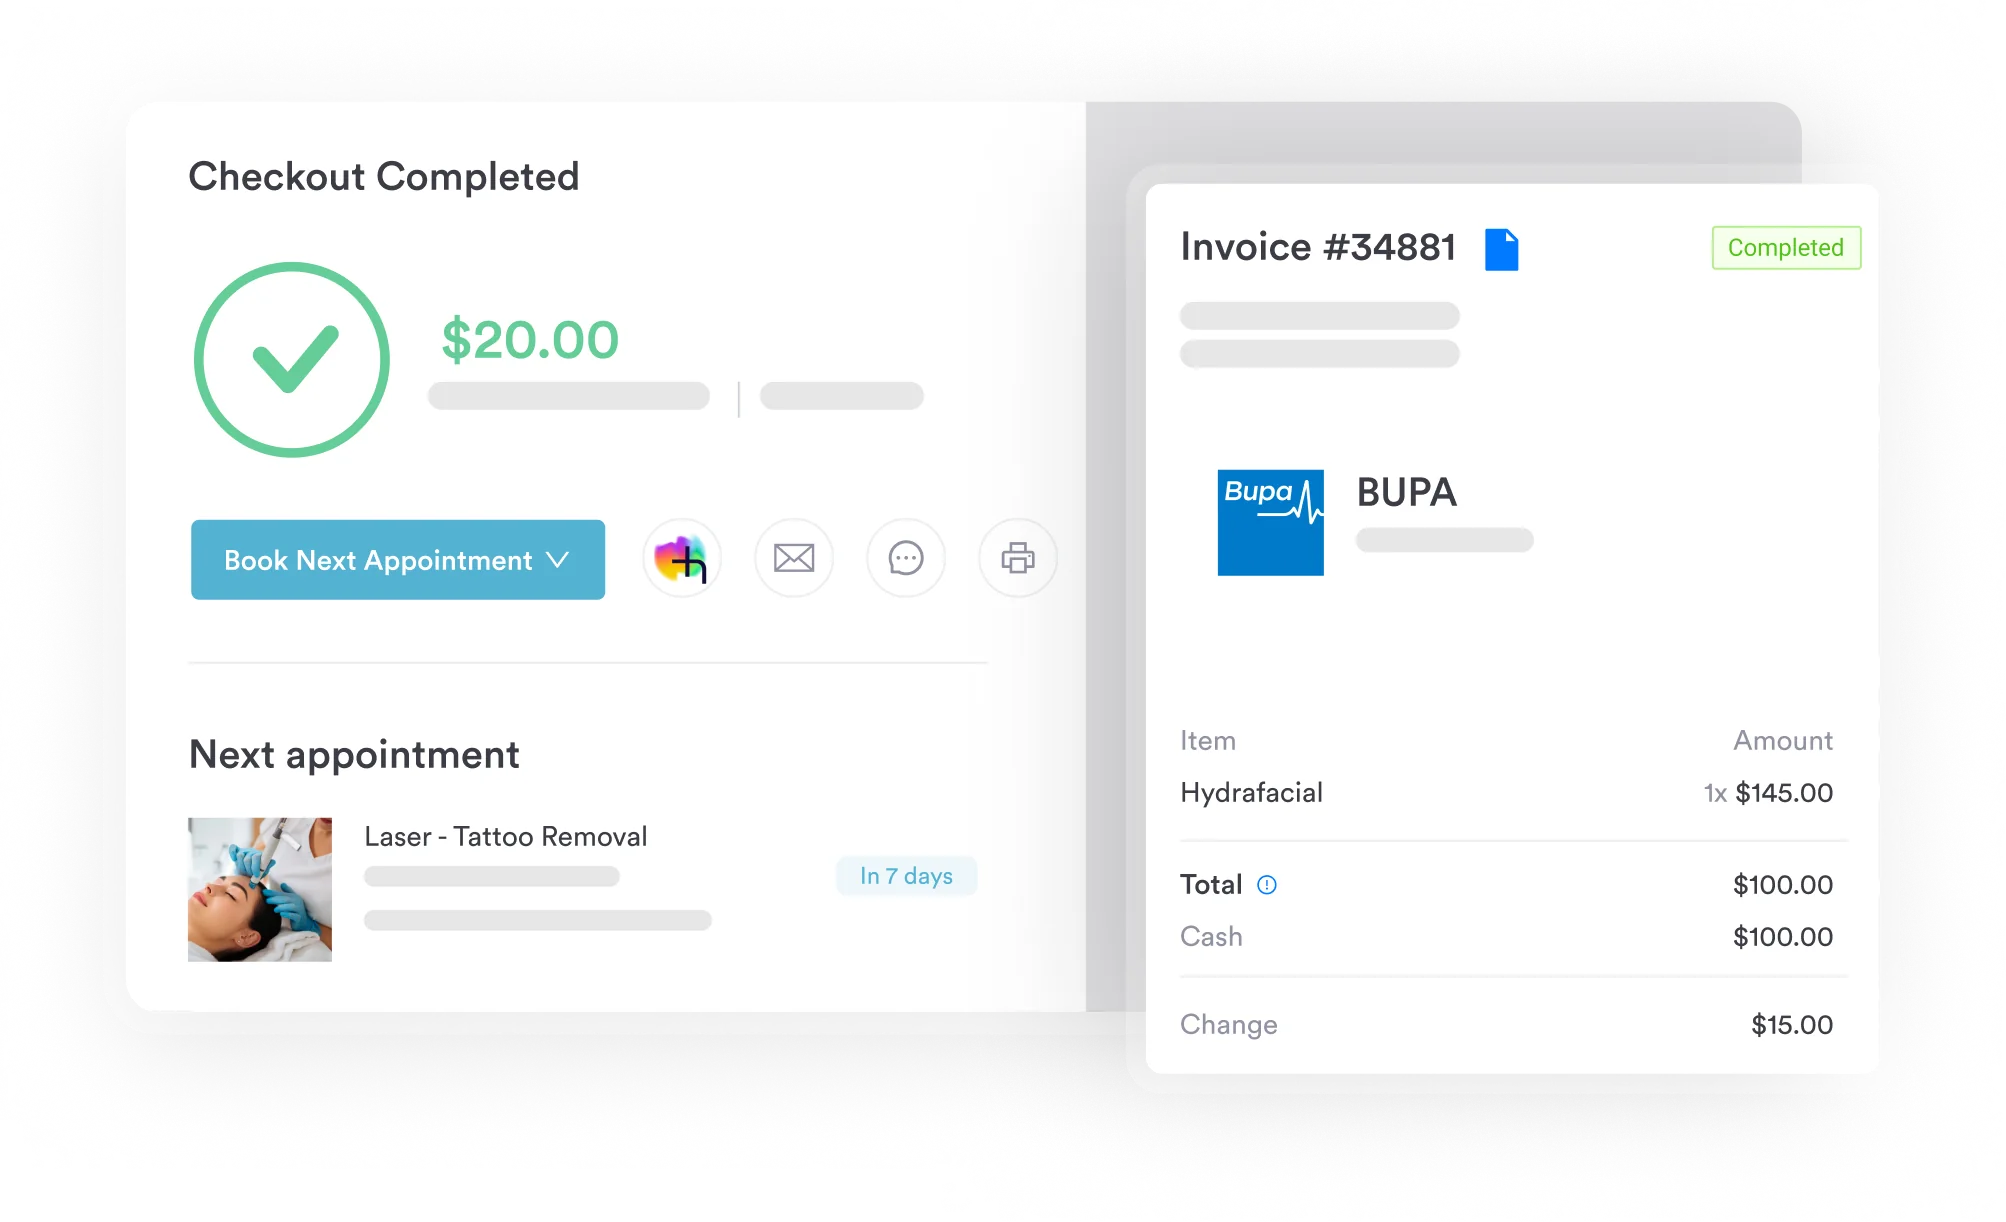
Practice management software like Pabau builds the claim from the record you already wrote. You document the treatment in the chart with the tooth number, surface, CDT code and fee. Pabau maps that to the claim’s fields, flags a missing payer ID or an unsigned authorization, and submits it. Your billing team reviews rather than retypes.
From there it tracks status, surfaces rejections as they come back, and keeps the paperwork behind an appeal in one place. Revenue cycle management stops being a spreadsheet someone updates on Fridays, so fewer claims sit unnoticed in a payer queue.
For a practice sending 50 to 100 claims a week, that is hours of administrative time returned to the front desk each week. Every Pabau subscription includes the full platform, so claims, charting and patient communication sit in one record rather than three systems.

Pabau creates each insurance claim from the treatment you already documented, validates it before it goes out, and tracks the payer response. Your team reviews claims instead of retyping them, and fewer denials come back for fixable errors.

Switching to the 2024 form is a smaller job than the billing press makes it sound. Learn four new fields, mark the locum tenens box when it applies, and the other 54 items behave exactly as your team already expects.
The denials worth worrying about are not caused by the form version. They come from data typed twice, and the fix is to stop typing it twice. Book a demo to see how Pabau builds dental claims from the treatment record and tracks them through to payment.

Checking coverage before the visit? Dental insurance verification form gives your front desk a structured way to confirm a plan and its payer ID before treatment starts.
Concerned about claim denials? Denial management in healthcare covers root causes of claim rejections and proven strategies to reduce your denial rate.
Want to understand your full billing workflow? What is revenue cycle management explains every step from appointment through payment, with practical benchmarks.
The ADA dental claim form is used to bill insurance payers for dental services delivered. It records the patient and subscriber, the treatment by tooth number and CDT code, and the fee charged. The payer uses that to verify coverage and pay the claim.
Version 2024 adds four fields to the 2012 form. Item 53a is a locum tenens checkbox, and item 39a takes the date of the last scaling and root planing. Items 3a and 11a take payer IDs for the primary plan and for any other coverage. The specialty code list at 56a was corrected, and a note on incisal-angle surfaces was added at item 28. Nothing else moved. The form still runs 10 sections and 58 numbered items, with 10 service lines.
Electronic claims reach the payer the day they are sent, while paper claims wait for mail transit and manual keying at the other end. Payment timelines themselves are set by each payer contract and by state prompt-pay rules, so check your agreements rather than a general benchmark.
Yes. Electronic dental claims use the EDI 837D transaction, the HIPAA standard for dental billing, and most practice management software supports it. The ADA keeps the paper form’s data content in step with that standard, so the same information is reported either way.
Each service line needs the CDT code that was in effect on the date of service, entered at item 29. Common examples are D0120 for a periodic oral evaluation and D1110 for adult prophylaxis. D4341 covers scaling and root planing of four or more teeth per quadrant. The code has to match what the clinical note records.
The ADA form is the standard US dental insurers accept, and version 2024 is the current release. Payers set their own dates for retiring an older version. Use the 2024 form for new claims, and check the payer’s provider bulletin if you still hold printed 2012 stock.
The ADA owns and copyrights the form, so printed pads come from the ADA Catalog and licensed electronic versions come from your practice management vendor. Many payers also host a fillable copy for the providers in their network.