Free model waiver form + what it is and when your practice needs one
A model waiver form is a signed document that lets a healthcare practice use a p...

2
Last Updated: Sep 29, 2026

Olidia PLLA is a biostimulator that drives collagen production over 6 to 12 weeks, so volume builds gradually instead of appearing on the day.
Each vial holds a 365mg lyophilized powder cake, made up of 150mg of PLLA, 90mg of carboxymethylcellulose and 125mg of mannitol. Nothing arrives pre-mixed.
Reconstitute with 5 to 7ml of sterile water or saline, then leave the vial undisturbed for about two hours. Short hydration is a known nodule risk.
Once reconstituted, the suspension stays usable for up to 72 hours, so you can mix ahead of the appointment rather than during it.
Results show at 3 to 4 weeks and peak at 8 to 12 weeks. Most protocols run 2 to 3 sessions spaced 4 weeks apart.
Pabau, our practice management software, plots injection sites, tracks results across sessions and sends aftercare messages automatically.
A patient-ready handout phased across the first 24 to 48 hours, the first week and the first month. It covers cold compress use, heat, sun and activity limits, the side effects to expect, and when to call you. It closes with a confirmation line the patient signs. Hand it out before they leave the treatment room.
Download templateOlidia PLLA gives aesthetic practices a collagen-stimulating alternative to hyaluronic acid fillers. Unlike a ready-to-inject gel, though, it arrives as a freeze-dried powder. As a result, that single detail shapes the whole appointment, because the vial has to be mixed and left to hydrate before anyone picks up a needle. Scheduling for visits like this is compared across eight platforms in our ranking of the best med spa software.
This guide covers reconstitution, hydration time, injection depth, treatment areas and the results timeline. In addition, it covers the aftercare instructions and the treatment records that keep a multi-session PLLA plan defensible.
Olidia PLLA is a poly-L-lactic acid biostimulator. Rather than adding volume on the day, as a hyaluronic acid filler does, it prompts the patient’s own collagen production.
Each vial holds a 365mg lyophilized cake rather than a liquid. Specifically, that cake is 150mg of PLLA, 90mg of sodium carboxymethylcellulose and 125mg of mannitol. In turn, the PLLA microparticles measure roughly 40 to 63 micrometers, small enough for fine needles and large enough to resist immediate phagocytosis.
Because the product ships dry, you set the final concentration yourself. Together, the diluent volume you choose and the time you give the powder to hydrate decide how the suspension behaves in the tissue.
Over 6 to 12 weeks the PLLA is absorbed. Meanwhile, it keeps stimulating fibroblasts to build new collagen fibers around the deposit. As a result, volume improves progressively and holds for far longer than hyaluronic acid, typically 18 to 24 months.
Olidia is made by PRP Life Sciences in South Korea, with Korean MFDS approval and a CE mark. However, it does not hold FDA approval for aesthetic use in the United States. Therefore, confirm what your own regulator allows before you order.
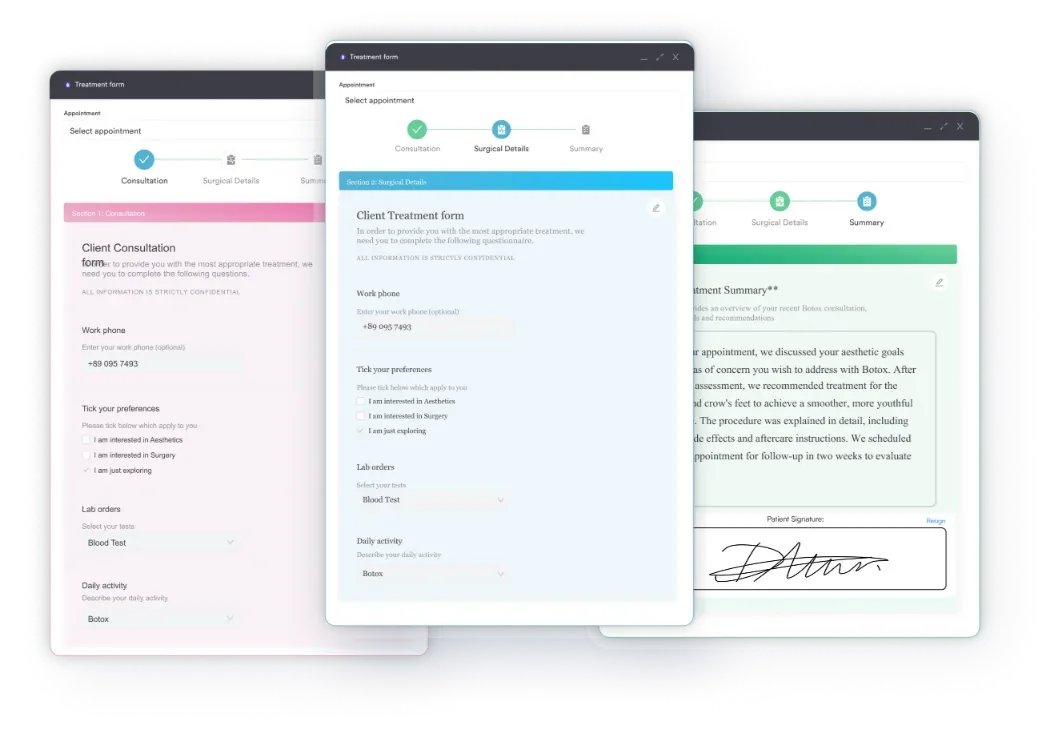
Olidia sits in the same category as Sculptra, one of several trending filler treatments patients now ask for. Whichever product you stock, though, the consultation carries the same load. So, use structured intake forms to record pre-treatment status and to set collagen-stimulation expectations in writing.
The download is a patient handout, not an internal protocol. Instead, it translates the clinical detail on this page into plain instructions a patient can follow at home.
Hand it over at checkout and keep a record that you did. The handout stops short of the massage schedule, so give patients that part yourself. Then, repeat it in the follow-up message once the numbing has worn off.
Your own session note stays separate from the patient’s copy. There, record the vial, the diluent volume and the treated sites, in the format a progress note template already sets out.
Both products are lyophilized PLLA biostimulators, and both work through neocollagenesis. Even so, the differences that matter in practice are the mix protocol, the regulatory status and the paperwork behind each one.
The mechanism is the same, so the choice usually comes down to availability, price and what your regulator permits. Either way, where Olidia is available, it carries the same 150mg PLLA dose per vial as the branded alternative.
Reconstitution is the cornerstone of safe PLLA administration. On one hand, under-dilution and short hydration both raise nodule risk. On the other, over-dilution wastes product and dilutes the collagen response. So, follow the steps below in order.
The two-hour wait belongs in the appointment schedule rather than the treatment room. So, mix the vial before the morning session block, or at least two hours ahead of the appointment, and record the mix time in the patient’s notes. Otherwise, rushing the mix on the day is how a suspension ends up under-hydrated.
Olidia PLLA is used across the zones below. Each area has its own aesthetic goal, however, and needs a technique adjustment. So, check your product license, because some of these uses are off-label in most markets.
Managing expectations decides retention on a biostimulator. PLLA results follow a predictable timeline, so share it before the first injection.
Day 1: mild swelling and erythema at the injection sites. Even so, most patients return to normal activities the same day.
Weeks 1 to 2: bruising resolves and swelling settles. Meanwhile, patients may notice a slight texture change as the microparticles integrate. There is no volume yet, though, and they need to hear that in advance.
Weeks 3 to 4: the early collagen response becomes visible. First, skin texture improves, and subtle volume follows after. As a result, patients often say their skin looks fresher before any change in contour shows.
Weeks 8 to 12: peak results. At this stage, volume, skin quality and definition reach their maximum, so this is the point to assess whether another session is needed.
Sessions and retreatment: most protocols run 2 to 3 sessions spaced 4 weeks apart. In practice, personalized treatment planning based on baseline volume loss sets the session count. After the initial series, patients usually return for a top-up every 12 to 18 months.
Duration: results typically last 18 to 24 months. However, longevity varies with metabolism, lifestyle and individual collagen response, so maintenance sessions extend results beyond that window.
Aftercare on a biostimulator asks more of the patient than a hyaluronic acid filler does. With Belotero aftercare, for instance, the patient avoids pressure on the area and waits. By contrast, with PLLA, the massage routine is part of the treatment, and nodule rates reflect how well you explain it.
Patients follow instructions better when they can see where each one sits in the recovery. To that end, the timeline below pairs the routine with what the tissue is doing at each stage.
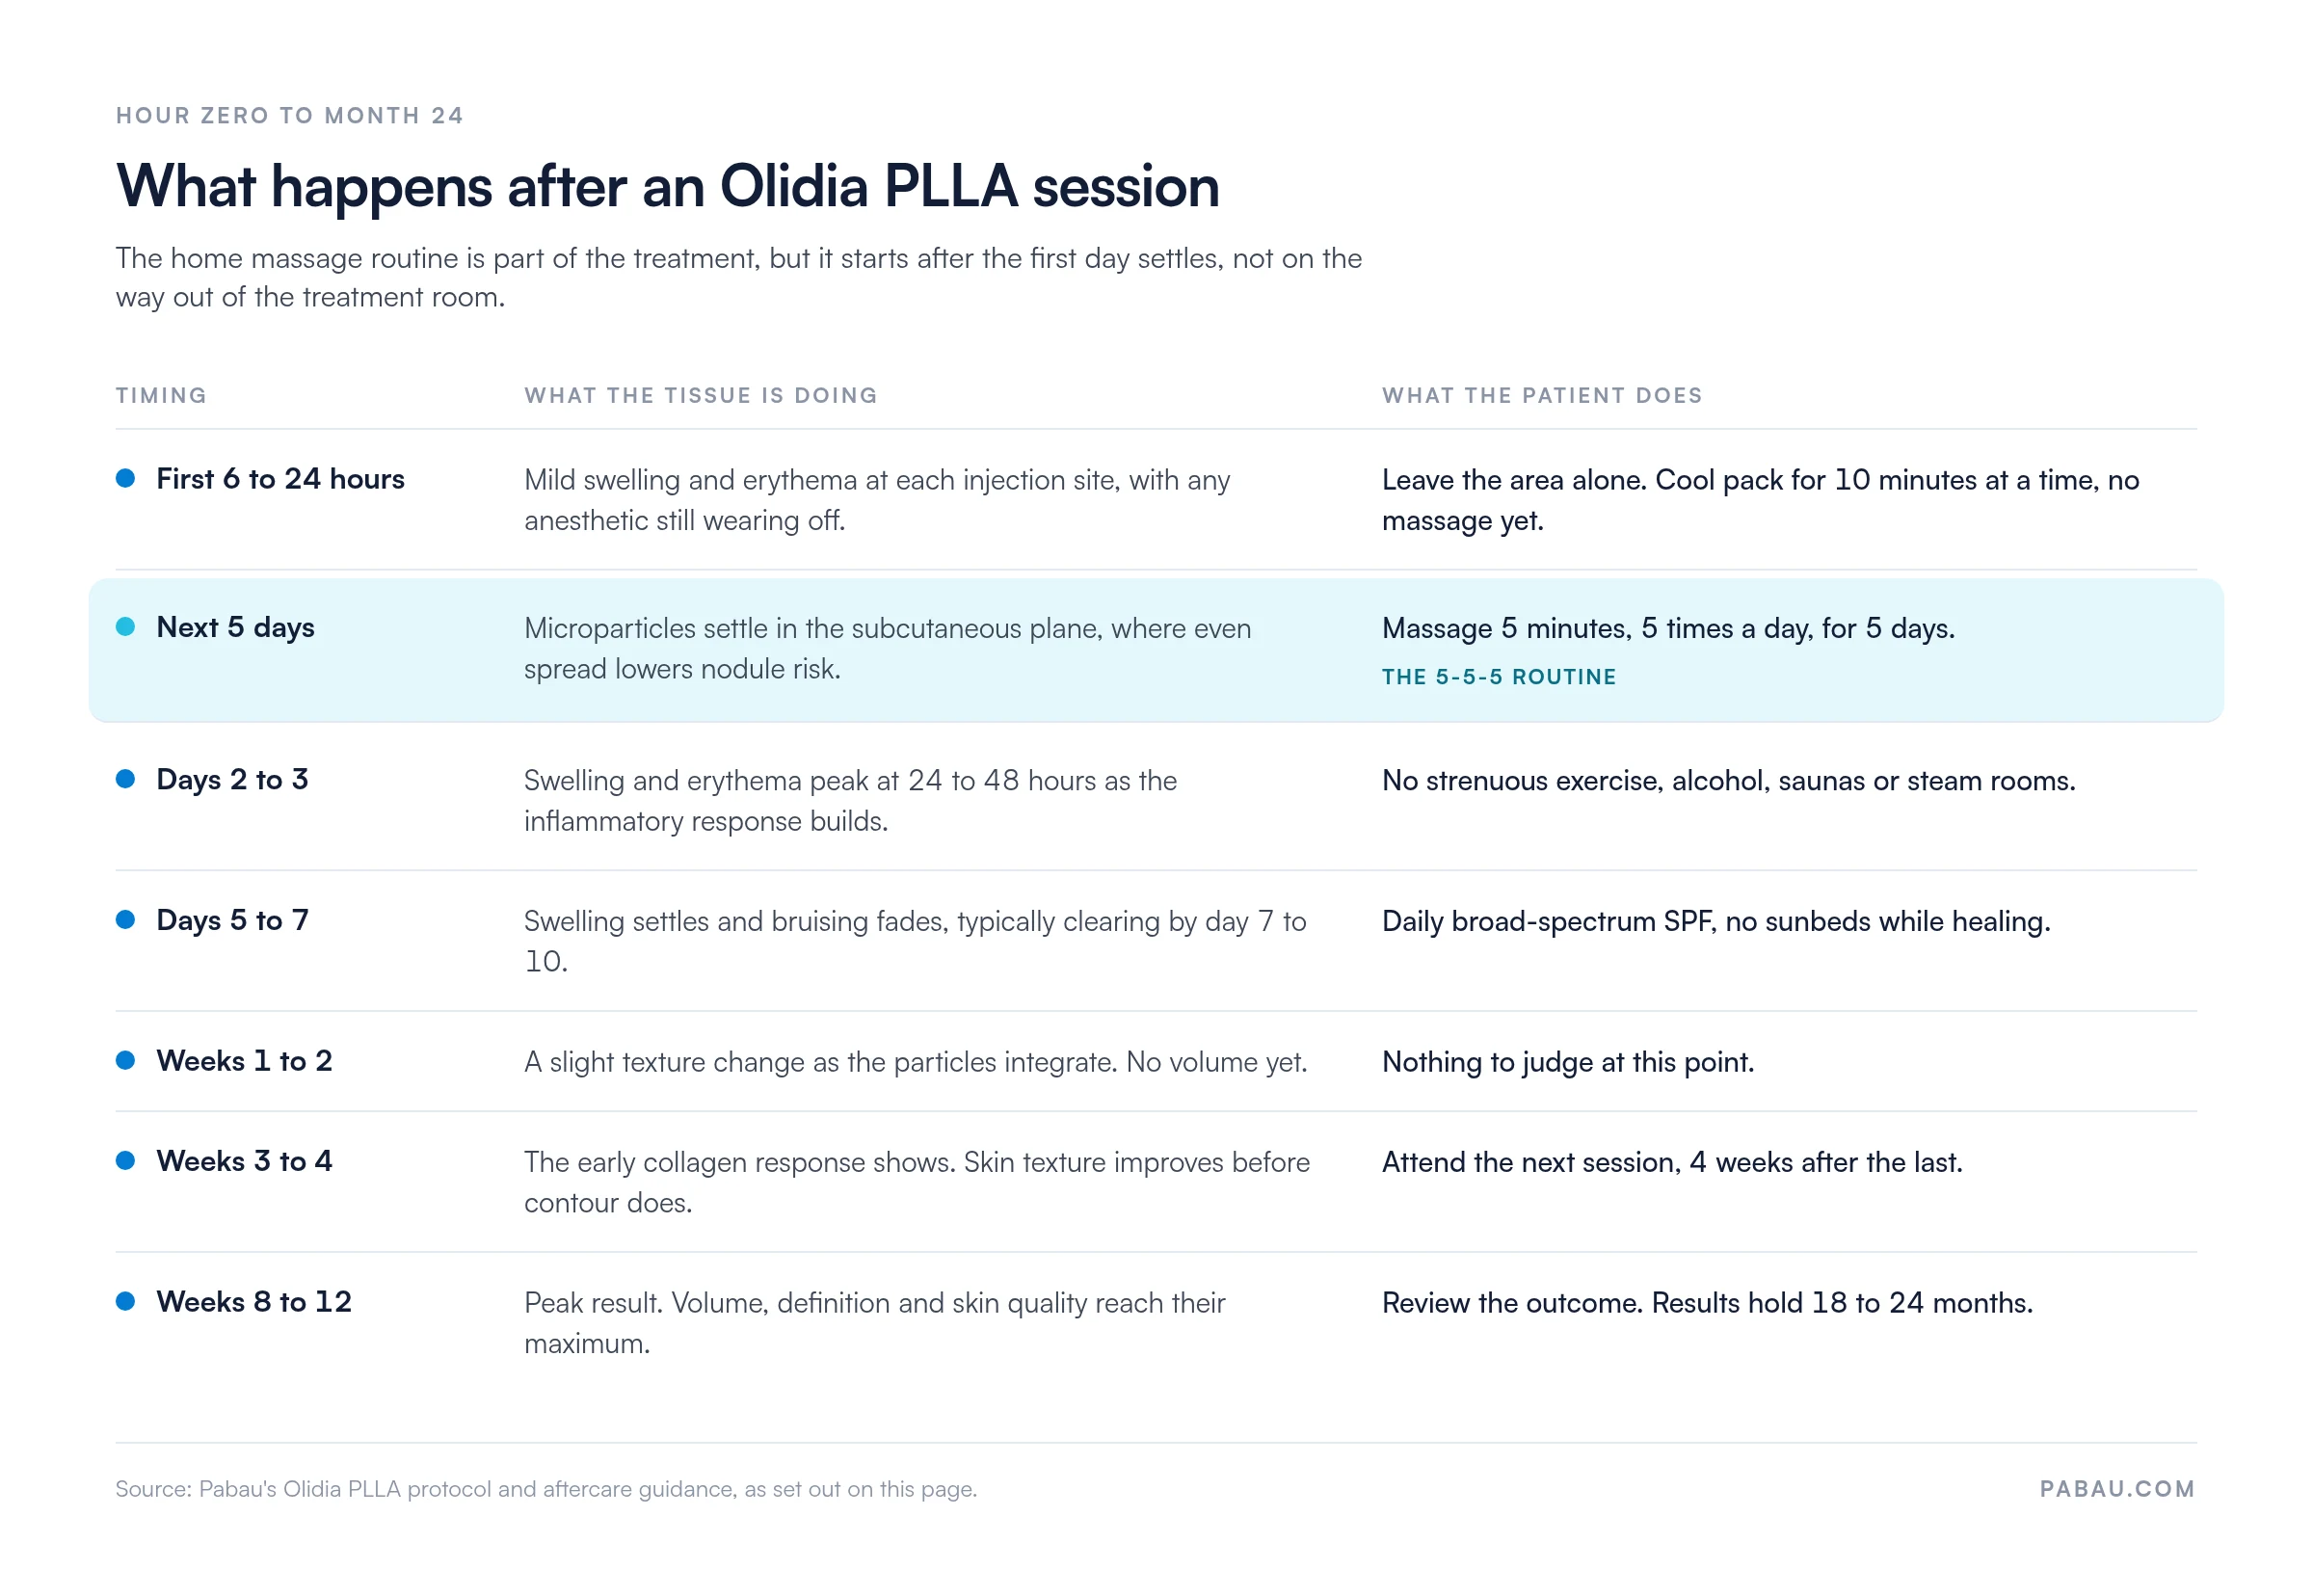
Handing this over verbally is where compliance leaks. So, send a written follow-up as well, timed to the days when the massage routine matters most. That way, a patient visit summary keeps the session details and the aftercare in one place.
PLLA biostimulators have a strong safety record when they are mixed and injected correctly. Even so, practitioners still need to recognize the adverse events and know the prevention strategy for each one.
Read the manufacturer instructions for the vial in front of you. In addition, check current guidance from bodies such as the European Academy of Dermatology and Venereology. Because protocol detail differs between PLLA products, never carry one brand’s mixing instructions across to another.
A biostimulator plan runs across months, so the record has to carry more than a date and a volume. If a nodule appears at week six, these fields are what let you reconstruct the session.
Keeping this in structured client records rather than free-text notes serves two purposes. First, it supports continuity across the treatment series, and second, it stands up if a complaint ever lands. Solo injectors gain the most, which is why the practice in our Kingswood Aesthetics case study moved off paper.
Most med spas run a PLLA series across three systems. The consent sits in a folder, meanwhile the injection map is a sketch in a paper chart, and the aftercare reminder depends on someone remembering to text. As a result, by session three, nobody can say which vial went where.
Pabau, our practice management software, keeps the series in one client record. Injection plotting logs each depot against an anatomical map, so the next session starts from what you actually did. Likewise, before-and-after photos sit in the same record, which makes the week-eight comparison a two-second job instead of a hunt through a phone.
The aftercare side runs on a schedule you set once. First, consent and intake forms go out digitally before the appointment. Then, the handout goes out at checkout, and the massage reminders start the next day, once the rest window has passed.
Every subscription includes every feature, so the plotting, the forms and the automated messaging sit in the plan you are already on.
The outcome is a treatment series you can defend and a patient who follows the massage routine. Together, that combination is what keeps nodule rates low and brings patients back for the maintenance session.

Plot injection sites, store baseline and follow-up photos, and send Olidia aftercare and massage reminders automatically. Your practice keeps a defensible record of every vial and every visit.

Olidia PLLA rewards patience more than technique alone. Two decisions separate a clean result from a nodule, and both are made before the needle comes out. The first is how much diluent you use. The second is whether you gave the vial its full two hours to hydrate.
Build the wait into your scheduling rather than around it. Mix at the start of the session block, label the vial with the time, and use the suspension inside 72 hours. Then, hand the patient a written aftercare sheet. After all, their five days of massage matter as much as your ten minutes in the room. So, tell them it begins once the first day has settled.
Track the series properly and the maintenance visit takes care of itself. To see this in practice, book a demo and see how Pabau records injection maps, stores treatment photos and automates Olidia aftercare for aesthetic practices.

Need a structured aesthetic consultation framework? Preparing for cosmetic client consultations guides practitioners through pre-treatment discovery and expectation-setting for injectable treatments.
Want to improve multi-session patient adherence? Reducing patient no-show rates covers the workflow changes that get clients through a full PLLA treatment series.
Looking for practice branding guidance? Medical spa branding tips helps aesthetic practices show their injectable expertise and build trust locally.
Combining injectables with energy-based devices? Nuera Tight aftercare sets out that treatment’s recovery window, so you can plan the two schedules around each other.
Documenting another injectable treatment? Silikon 1000 aftercare covers the patient instructions and follow-up schedule for a permanent filler.
Olidia PLLA is a poly-L-lactic acid biostimulator filler that stimulates the patient’s own collagen production. It ships as a 365mg lyophilized powder vial containing 150mg of PLLA. Reconstituted and injected subcutaneously, it delivers gradual volume and skin quality improvement over 6 to 12 weeks.
Both are lyophilized PLLA biostimulators with the same mechanism and the same 150mg PLLA dose per vial. Expected duration is 18 to 24 months for either product. The differences are regulatory and practical. Sculptra is FDA approved in the United States, while Olidia is Korean MFDS approved and CE marked.
Results develop gradually over 3 to 4 weeks and peak at 8 to 12 weeks after injection. Expected duration is 18 to 24 months. Longevity varies with metabolism and individual collagen response. Maintenance sessions every 12 to 18 months sustain the result beyond that window.
Common side effects are mild bruising, swelling and erythema, which usually resolve within 7 to 10 days. Rarer events include transient nodules, which respond to massage, and granuloma, which occurs in under 1% of cases with sound technique. Granulomas respond to intralesional corticosteroid injection or observation.
Olidia PLLA suits most skin types, but screen for contraindications first: active inflammation, pregnancy, keloid tendency and immunosuppression. Darker skin types can see transient hyperpigmentation after treatment. Record baseline status in structured intake forms and set expectations against the patient’s starting point.