GLP-1 diet plan
A GLP-1 diet plan is a structured eating framework for patients taking semagluti...

2
Last Updated: Oct 13, 2026

The WHO Surgical Safety Checklist is a 19-item tool that surgical teams run out loud at three points in every case.
The three phases are Sign In before anesthesia, Time Out before the incision, and Sign Out before the patient leaves the room.
In the study behind it, death rates fell from 1.5% to 0.8% and inpatient complications from 11% to 7%.
The WHO expects you to adapt it, so a private practice can trim the anesthesia items and keep the site and consent checks.
Download the free safety checklist template below, name one person to own it, and file every completed copy in the patient record.
This safety checklist template lays out all 19 checks phase by phase, across Sign In, Time Out, and Sign Out. Print it as it stands, or adapt the wording to match the procedures you perform.
Download templateThe WHO Surgical Safety Checklist is a 19-item patient safety checklist that a surgical team works through out loud before, during, and after an operation. The World Health Organization released it in 2008, and it is now the global reference for operating room safety.
It works the same way in a hospital operating room, an ambulatory surgery center, and a private surgical suite. What changes between them is how much of the anesthesia section you need.
The table below sets out all three phases in one place. After it, you get the items a practice can safely trim for procedures under local anesthetic.
The WHO Surgical Safety Checklist is a 19-item form that a surgical team confirms verbally at three points in a case. The WHO Safe Surgery Saves Lives program built it with a team led by Dr Atul Gawande. He founded Ariadne Labs four years later, in 2012, and it now maintains the checklist and its implementation guidance.
Each item is spoken and answered by the person responsible for it. The surgeon, the anesthesiologist, and the nursing team each own their own lines. Saying them aloud is the point, because a silent checkbox catches nothing.
The 19 items cover patient identity, the procedure and site, consent, allergies, and anesthesia equipment. They also cover antibiotic timing, sponge and instrument counts, specimen labeling, and the handover to recovery. CQC inspections in the UK expect a protocol like this, and The Joint Commission requires similar verification in US hospitals. Collected once and stored where clinicians read it, patient intake software removes the second round of questions.
Wrong-site surgery, retained instruments, and vague handovers still harm patients in well-run operating rooms. Many of those events trace back to something nobody said out loud. Safe surgery depends less on skill than on a handful of facts being spoken rather than assumed.
That is what the WHO’s Safe Surgery Saves Lives program set out to fix, by forcing those few sentences into the routine.
A landmark 2009 study in the New England Journal of Medicine tested the checklist across eight hospitals in eight countries. Death rates fell from 1.5% to 0.8%. Inpatient complications fell from 11% to 7%. Those teams got that result with no new equipment and no extra staff.
Here are the figures worth quoting when somebody asks why they should stop and read a form.
| Detail | Figure |
|---|---|
| Released | 2008, by the WHO’s Safe Surgery Saves Lives program |
| Items | 19 checks, grouped into three phases |
| Time per case | About five minutes of talking, two to three of it at Time Out |
| Evidence base | Eight hospitals across eight countries, published in 2009 |
| Death rate | Fell from 1.5% to 0.8% |
| Inpatient complications | Fell from 11% to 7% |
| Cost to adopt | No new equipment and no extra staff |
Nothing in that table needed a budget, which is what makes it portable to a two-room practice.
Each phase sits at a moment where an error is still cheap to fix. Together they take about five minutes of talking.
| Phase | Timing | Team action and checklist items | Who verifies | Why it matters |
|---|---|---|---|---|
| Sign In | Patient in the room, before any anesthesia or sedation | Identity on two identifiers, procedure and site against the signed consent, site marking, allergies, airway and pulse oximetry checks, blood availability | Anesthesiologist with the circulating nurse, and the patient answering for themselves | The patient can still correct you, and equipment problems surface before induction |
| Time Out | Patient anesthetized and positioned, before the first cut | Introductions by name and role, second identity and site check, critical steps, expected blood loss, antibiotics inside 60 minutes, imaging displayed | The whole room, led by the surgeon, with each person answering their own line | Wrong-site and wrong-patient errors get caught by a second, independent check |
| Sign Out | Case finished, before the patient leaves the operating room | Procedure named as performed, sponge, needle and instrument counts, specimen labels, equipment or implant problems, recovery handover | Scrub nurse reads the counts, surgeon confirms the procedure and the handover | Retained items and mislabeled specimens are still fixable while the team is together |
The verification column is the one to settle before your first case. In a hospital those roles are obvious, and in a two-person treatment room they are not.
Sign In runs as the patient arrives in the room, before any sedation. Doing it while the patient can still answer is deliberate.
The airway and oximetry items assume somebody already recorded the patient’s normal. A respiratory assessment from the pre-op visit gives the anesthesiologist a baseline to compare against.
The surgery time out checklist is the surgical pause, and the phase teams shorten first when a list runs late. The patient is anesthetized and positioned, and the first cut has not happened yet.
An operating room time out stops everybody for two or three minutes, the surgeon included. Run it as a call and response, with the named person answering, rather than as a recital.
Imaging is the item that most often stalls a Time Out. Pull the study and its radiology report before the patient is positioned, so nobody hunts for a screen with the drapes on.
Sign Out happens while the team is still together, before the patient moves to recovery.
The handover is where detail leaks. A structured handover sheet keeps the recovery nurse working from the same facts as the surgical team.
Recovery then picks the record up from there. A focus charting format keeps each note tied to the problem the team flagged at Sign Out.
Start a preoperative checklist with one named owner and one week of team training, not a policy document.
Ask the team what slows them down, then change the form rather than the people. A form that fights your workflow gets signed without being read.
The standard 19 items assume general anesthesia and a full operating room team. A plastic surgery practice operating under general anesthesia keeps every one of them. A dermatology practice doing excisions under local anesthetic doesn’t need the airway and blood items.
Two settings break the hospital assumption outright. A solo practitioner placing threads or excising a lesion under local anesthetic has nobody else to verify anything.
A med spa running liposuction under sedation has one assistant, and that assistant is also monitoring the patient. Neither room can spread five verifying roles across five people.
In both cases, move the verification you can onto the patient. Sign In already happens before sedation for that reason, so identity, site, and consent get confirmed by the person on the table. Do the counts yourself before closing, out loud, with the assistant answering.
Here is where to cut, and where to hold the line.
Decide in advance which procedures get the full form and which get the short one. Put that decision in writing, so a busy afternoon doesn’t make it for you.
The figures above came from teams that ran the checklist properly. Later studies keep pointing at the same variable. The benefit tracks how fully a team completes the checks. Filing the form changes nothing on its own, and a checklist signed after the fact protects nobody.
Completion is only measurable if you can find the forms. Clinical documentation software records each checklist against the case, so a monthly completion rate takes a query rather than a cabinet.
Teams also report better communication once the Time Out becomes routine. A junior nurse finds it easier to raise a concern when the pause is scheduled rather than improvised. WHO safe surgery resources include training material and implementation guides you can use as they are.
When an event does happen, the checklist and your incident report together show what was checked and when. That pairing is what an inspector or an insurer asks for.
Expect resistance in the first month. The objections are predictable, and so are the answers.
A chart audit tells you whether the filed checklists match the cases you performed. Celebrate the first catch out loud, because one prevented error convinces people faster than a policy ever will.
Any place where a procedure breaks the skin can run the three-phase model. That covers hospitals, ambulatory surgery centers, private surgical suites, cosmetic surgery practices, and dermatology rooms doing excisions.
Endoscopy, colonoscopy, and dental extraction lists all work from a shortened version. The principle doesn’t change. Confirm identity, procedure, and site out loud before you start.
The checklist also assumes the paperwork behind it is already done. The history and physical form belongs in the record before the patient reaches the room, not after. So does a current medication review, since the allergy and medication checks at Sign In read from it.
Most practices run the checklist on paper. It gets signed in the room, then scanned or dropped into a folder nobody opens until an inspection. Finding one specific checklist six months later costs somebody a morning.
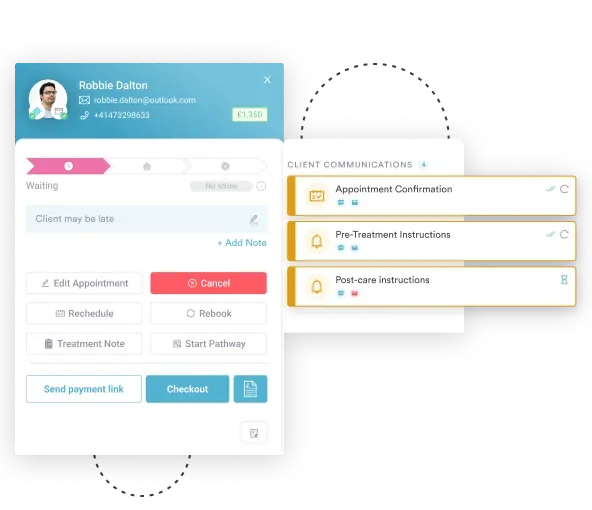
Practice management software like Pabau keeps the checklist attached to the case instead. You build the 19 items as a digital form, and it opens on the same record as the appointment, the consent, and the treatment note. Nothing needs scanning, and nothing gets filed under the wrong patient.
Build each phase as its own section on that form. Completion is then recorded phase by phase against the procedure. You can see that a room skipped Sign Out, not just that the form was signed.
Automated workflows prompt the coordinator before the patient arrives. Compliance tracking shows completion by team member and date, so your monthly review takes minutes. When HIPAA and GDPR questions come up, the audit trail is already sitting in the record.
The team ends up completing the checklist because it is already in front of them. You end up with records you can produce on request, without opening a cabinet.

Pabau’s digital forms, automated workflows, and compliance reporting keep each surgical safety checklist attached to the patient record and ready to audit.

The checklist earns its results from being spoken, not from being filed. Read all 19 items out loud, with the named person answering each one, and you get the benefit the trial found. Sign the form at the end of the day and you get paperwork.
So download the template, decide which procedures get the full version, and name the person who owns it. Then look at your completion rate in a month, while habits are still forming. Book a demo to see how Pabau keeps every completed checklist in the patient record and ready for inspection.

Need to hand the patient over safely after recovery? The discharge planning checklist carries the Sign Out handover through to the moment the patient goes home.
Operating on a patient under 18? The medical consent form for minors covers the signatures and guardian details your Sign In check depends on.
Screening for gastrointestinal symptoms pre-op? GI review of systems form covers 13-plus GI symptom parameters, constitutional symptoms, and risk screening for informed consent.
Sending a patient home after a dental procedure? gum contouring aftercare guide covers pain management, diet, oral hygiene, activity limits, and the expected healing timeline.
Running extraction lists in a dental practice? The dental treatment consent form pairs with a shortened three-phase check for chairside procedures.
Sign In happens before anesthesia and covers identity, procedure, consent, and anesthesia safety. Time Out happens before the incision and covers team introductions, a second site check, critical steps, and antibiotics. Sign Out happens before the patient leaves the room and covers the procedure performed, counts, specimen labels, and the recovery handover.
A surgery time out is the pause immediately before the first incision. The whole team stops and confirms the patient, the procedure, and the site out loud. An operating room time out also covers the critical steps, expected blood loss, antibiotic timing, and any imaging the case relies on. It takes two to three minutes.
Yes, and the WHO encourages it. Trim the airway, blood, and pulse oximetry items for procedures under topical anesthetic. Keep identity, consent, allergy, and site marking checks for every procedure. Write down who confirms each item, since a small team can’t spread the checks the way a hospital does.
No law names the checklist, but NHS guidance and CQC inspection standards expect systematic safety verification in operating rooms. The WHO checklist is the recognized standard and lines up with NatSSIPs (National Safety Standards for Invasive Procedures). A private practice is not legally required to use it, though doing so demonstrates due diligence.
It sharply reduces the risk. Identity, procedure, and site are verified out loud twice, at Sign In and again at Time Out, by different people. No process is foolproof, but the evidence shows the checklist catches the great majority of wrong-site and wrong-procedure errors before harm reaches the patient.
About five minutes in total across the three phases, with the Time Out taking two to three minutes of it. Teams that find it slower are usually reading items that don’t apply to their procedures, which is what the adaptation step is for.
Use the download box at the top of this page. The PDF carries all 19 items across the three phases, ready to print or adapt. The WHO website also publishes the official version alongside its implementation guides.