Treatment summary
A treatment summary is a written record of what care was delivered during an epi...

4
Last Updated: Oct 16, 2026
A nursing lung assessment is a structured evaluation of the lungs and respiratory system using four sequential techniques: Inspection, palpation, percussion, and auscultation. According to the NCBI Nursing Skills textbook, this four-technique sequence is the evidence-based standard for identifying normal and abnormal respiratory findings across care settings.
Done well, it catches respiratory deterioration before a patient’s condition becomes critical. Normal findings are symmetrical chest expansion, resonant percussion, and vesicular breath sounds across all lung fields. Any deviation gets charted by technique, site, and phase, then escalated against set thresholds.

A nursing lung assessment follows four techniques in order: Inspection, palpation, percussion, and auscultation.
Vesicular breath sounds are normal. Crackles, wheezes, rhonchi, and pleural rub are adventitious sounds that need clinical interpretation.
Posterior auscultation sites are critical for detecting lower-lobe pathology such as basal consolidation or pleural effusion.
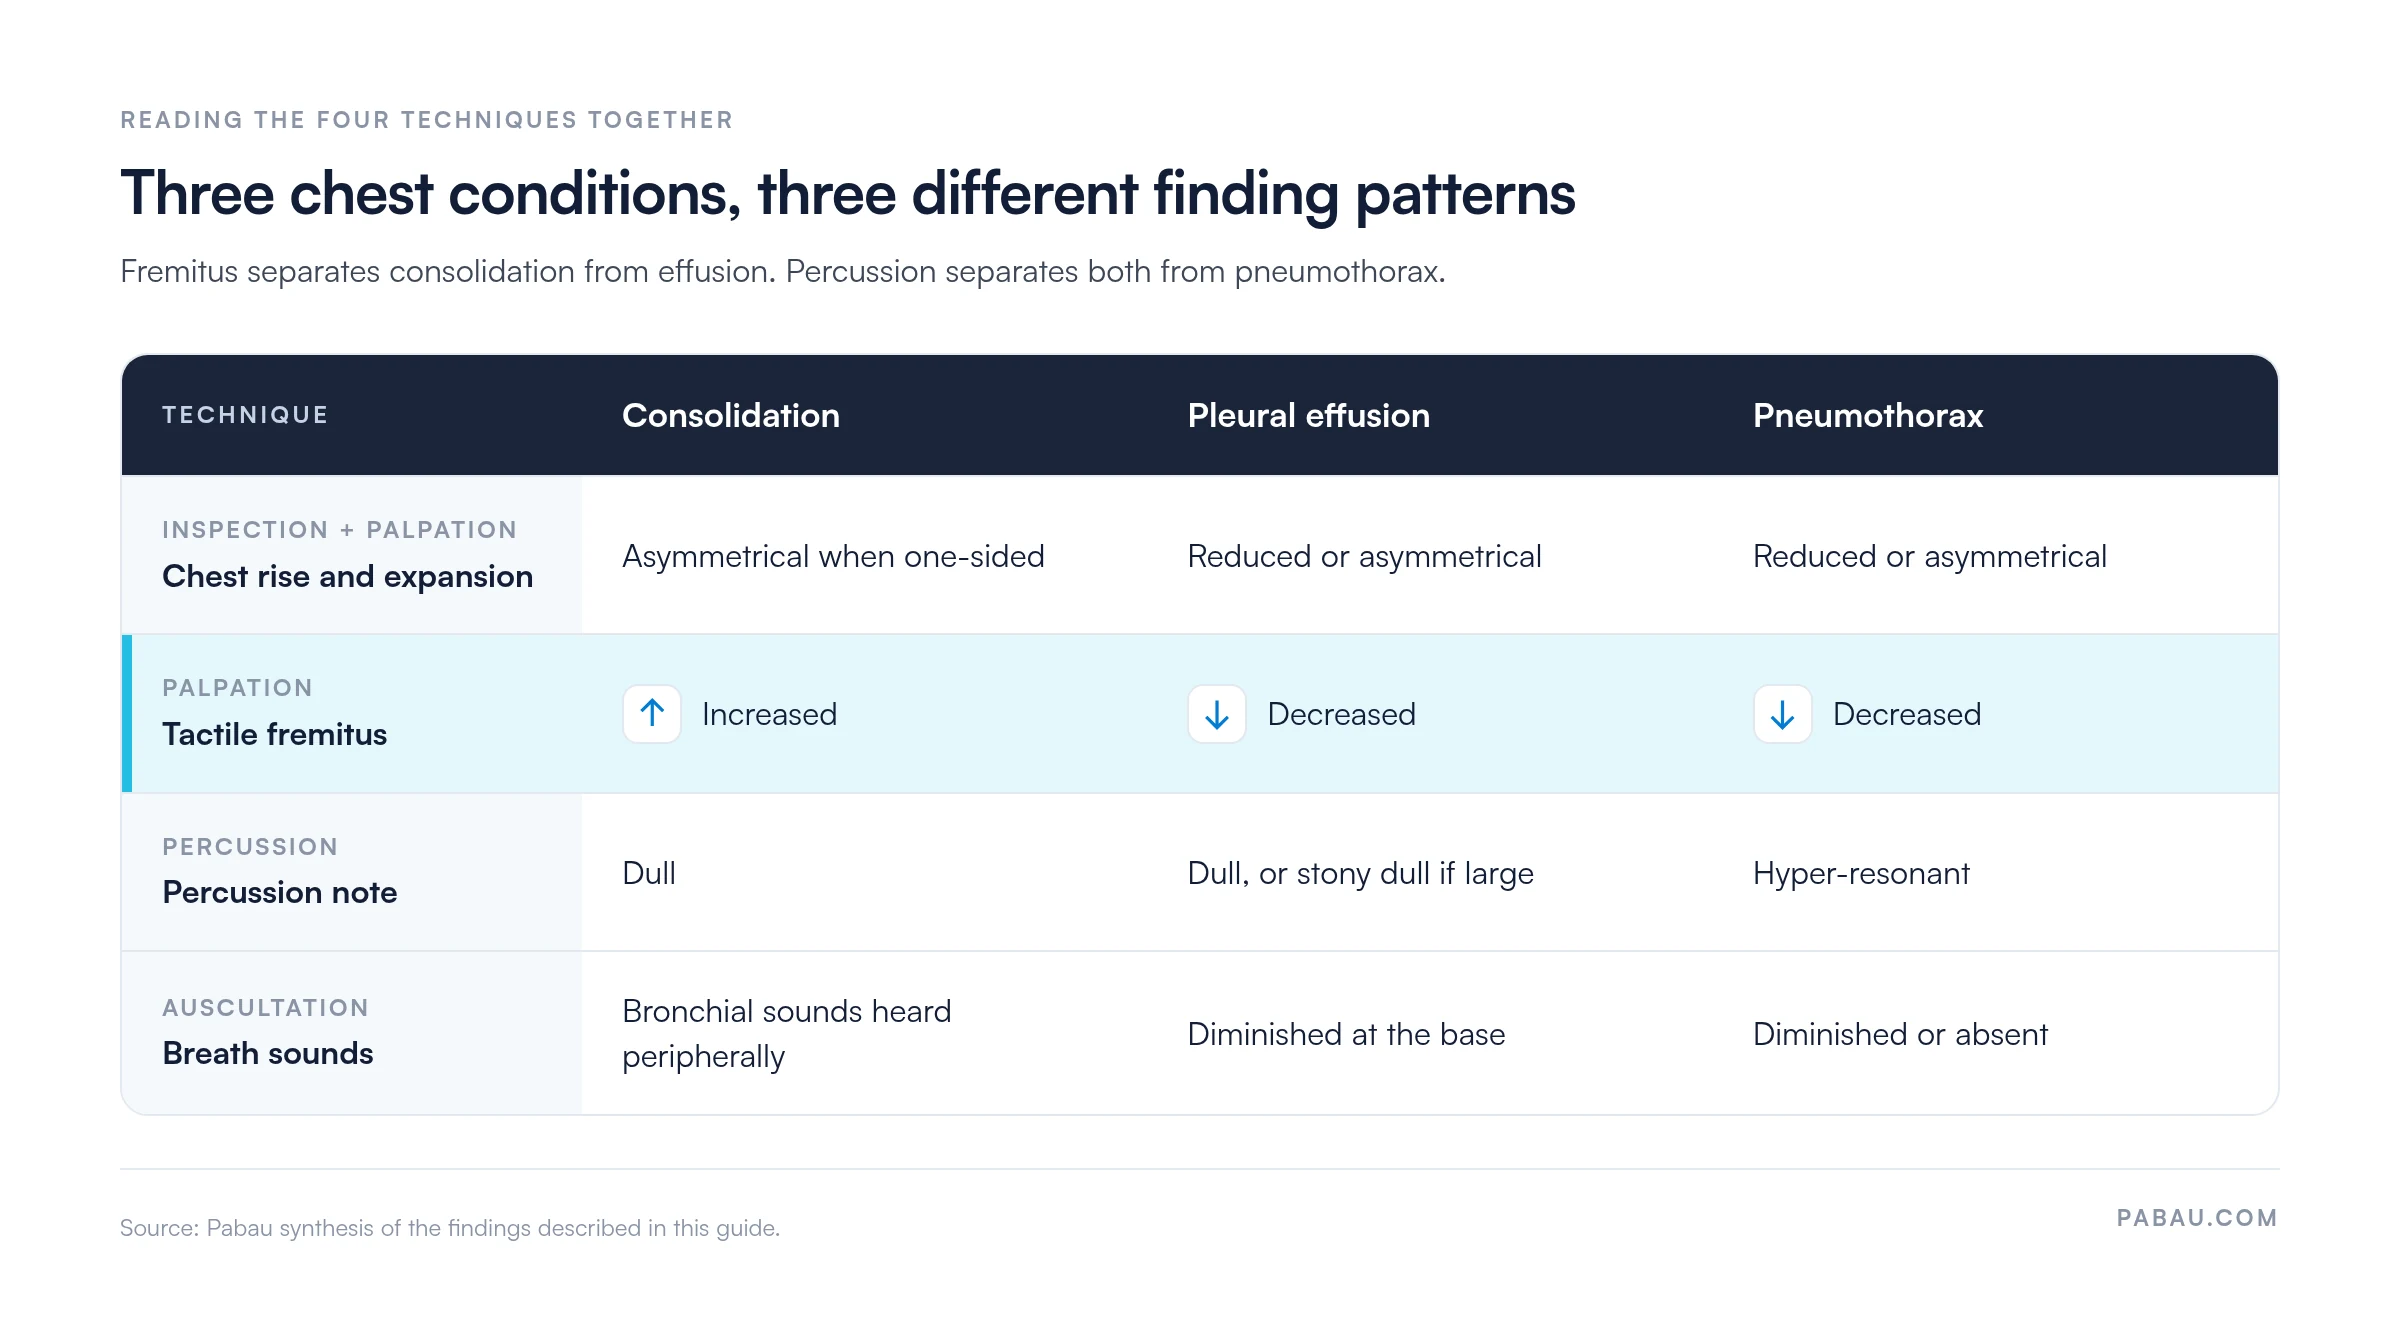
No single technique confirms a diagnosis, but fremitus, percussion, and breath sounds together separate consolidation, effusion, and pneumothorax.
Chart every finding by technique, site, and phase so the next nurse can compare it across shifts.
A nursing lung assessment is a systematic examination of the thorax and respiratory system used to identify normal function and detect pathology. It forms part of a full head-to-toe assessment. Nurses also run it as a focused respiratory assessment for dyspnea, low oxygen saturation (SpO2), an abnormal respiratory rate, or post-procedural changes.
Nurses in acute, community, and primary care settings perform this assessment routinely to establish baseline readings and to monitor for deterioration.
The two main assessment contexts are:
Private practices managing patients with chronic respiratory conditions, post-operative recovery, or complex comorbidities benefit from standardized assessment workflows. Physical therapy practices and other multidisciplinary settings often fold lung assessment into broader musculoskeletal and functional evaluations, particularly for patients with thoracic involvement.
The clinical sequence for a nursing lung assessment always follows the same order: Inspection first, then palpation, percussion, and auscultation. Deviating from this sequence risks missing findings that earlier steps would have flagged. Each technique builds context for the next.
Inspection is the visual component of respiratory assessment. It requires no equipment and provides immediate clinical information before the nurse touches the patient. Judge cyanosis in good natural light, because poor lighting hides the skin color changes that signal hypoxemia.
Palpation confirms what inspection suggested and adds tactile information about chest wall movement and vocal vibration transmission.
Chest expansion: Place both hands symmetrically on the posterior chest at the level of the 10th rib, thumbs meeting at the midline. Ask the patient to take a deep breath. Normal expansion is symmetrical and equal bilaterally. Reduced or asymmetrical expansion may suggest pneumothorax, pleural effusion, or chest wall splinting.
Tactile fremitus: Place the ulnar aspect of both hands on the posterior chest. Ask the patient to say “ninety-nine” repeatedly while you move systematically across lung fields. Increased fremitus occurs with consolidation (sound transmits through solid tissue more readily); decreased fremitus occurs with pleural effusion or pneumothorax (fluid or air blocks transmission).
Percussion uses a tapping technique to assess the density of underlying tissue. Place the distal phalanx of your non-dominant middle finger firmly on the chest wall and strike it with the tip of your dominant middle finger.
Lung auscultation is the most detailed component of the nursing lung assessment. It requires a quality stethoscope, patient cooperation, and a systematic approach to ensure all lung fields are assessed. Ask the patient to breathe slowly and deeply through the mouth throughout.
The correct auscultation sequence moves from apex to base, comparing left and right sides at each level. Using the diaphragm of the stethoscope, press firmly against bare skin. Clothing muffles sounds and introduces artifact.
Always compare left to right at each position rather than listening to all positions on one side before moving to the other. This lateral comparison catches subtle asymmetry that sequential assessment misses.
Lung sound classification distinguishes normal sounds from adventitious (added) sounds. The table below provides a quick reference for the most clinically significant categories.
A key clinical distinction: Wheezes and rhonchi are continuous sounds, while crackles are discontinuous. Rhonchi that clear after the patient coughs suggest secretions rather than fixed airway pathology. Stridor heard without a stethoscope is a medical emergency requiring immediate escalation.
No single technique confirms a diagnosis, but the pattern across all four usually points one way. Over a pneumothorax, breath sounds are diminished or absent on the affected side, and percussion turns hyper-resonant rather than dull. The grid below shows how the findings combine for the three conditions the earlier steps flag most often.
Always document whether adventitious sounds are inspiratory, expiratory, or both-phase. The timing in the respiratory cycle carries clinical weight. Fine inspiratory crackles suggest early interstitial pathology, while late inspiratory crackles are more associated with pulmonary edema. This distinction takes seconds to capture but significantly improves the clinical picture for the next assessor.
Dyspnea quantification supplements the nursing lung assessment by capturing the patient’s subjective experience of breathlessness alongside objective findings. The mMRC (modified Medical Research Council) dyspnea scale is a validated five-grade tool used in COPD and other chronic respiratory conditions.
The GOLD (Global Initiative for Chronic Obstructive Lung Disease) guidelines recommend using the mMRC scale as part of a comprehensive COPD assessment. An mMRC score of 2 or above generally indicates significant functional impairment and warrants further evaluation or specialist referral.
Beyond the mMRC scale, the following objective thresholds warrant escalation in adults:
Pediatric respiratory assessment follows the same four-technique framework but requires age-specific reference values and adapted technique. Children have smaller chest walls, faster baseline respiratory rates, and different patterns of respiratory compensation that nurses must recognize.
Age-specific normal respiratory rates (breaths per minute):
The American Thoracic Society notes that children compensate for respiratory failure through increased work of breathing before SpO2 drops. This means tachypnea, nasal flaring, and retractions are earlier and more reliable distress signals than SpO2 alone in pediatric patients.
A “silent chest” in a child with asthma (no wheeze audible despite severe distress) indicates near-complete airway obstruction and requires immediate escalation.
Accurate documentation of a nursing lung assessment protects the patient, supports clinical handover, and meets the Joint Commission’s standards for respiratory assessment records. Whether you use a SOAP note or an EHR template, the entry must let another clinician understand the patient’s respiratory status without re-assessing.
Well-structured SOAP note documentation follows this pattern for respiratory findings:
The following phrases are illustrative examples only. Institutions may have specific documentation requirements and nurses should follow local guidelines. These phrases demonstrate the specificity and structure that effective respiratory charting requires.
Using digital intake forms designed with structured assessment fields reduces free-text variability and makes respiratory findings easier to retrieve, compare, and audit across patient visits. Consistent field structures also lighten the documentation burden by replacing unstructured narrative with guided prompts.

The same discipline applies when a head-to-toe assessment moves on to neurological assessment documentation. A note reading “neuro intact” leaves the next clinician with no score to compare against the last shift.
Use the following sequential checklist as a bedside or pre-assessment reference. It covers every component of a complete nursing lung assessment in the correct clinical order.
For pediatric patients, substitute age-appropriate respiratory rate thresholds and assess for nasal flaring, grunting, and head bobbing as additional distress indicators. The CDC National Center for Health Statistics publishes reference data for pediatric vital sign norms used to validate these thresholds clinically.
To run the same sequence on a fillable form rather than paper, start from our respiratory assessment template.
Private practices managing patients with chronic respiratory conditions face a specific documentation challenge. Findings need to be structured enough to compare across visits and specific enough to be clinically useful. Charting also has to be quick, or it eats into patient contact time.
Practice management software like Pabau handles both sides. Pabau Scribe, our AI scribe, turns spoken findings into a structured treatment note, so nurses spend less time typing free text after each assessment. Those notes sit in structured patient records, where you can track breath sounds, SpO2 trends, and mMRC grades across visits.
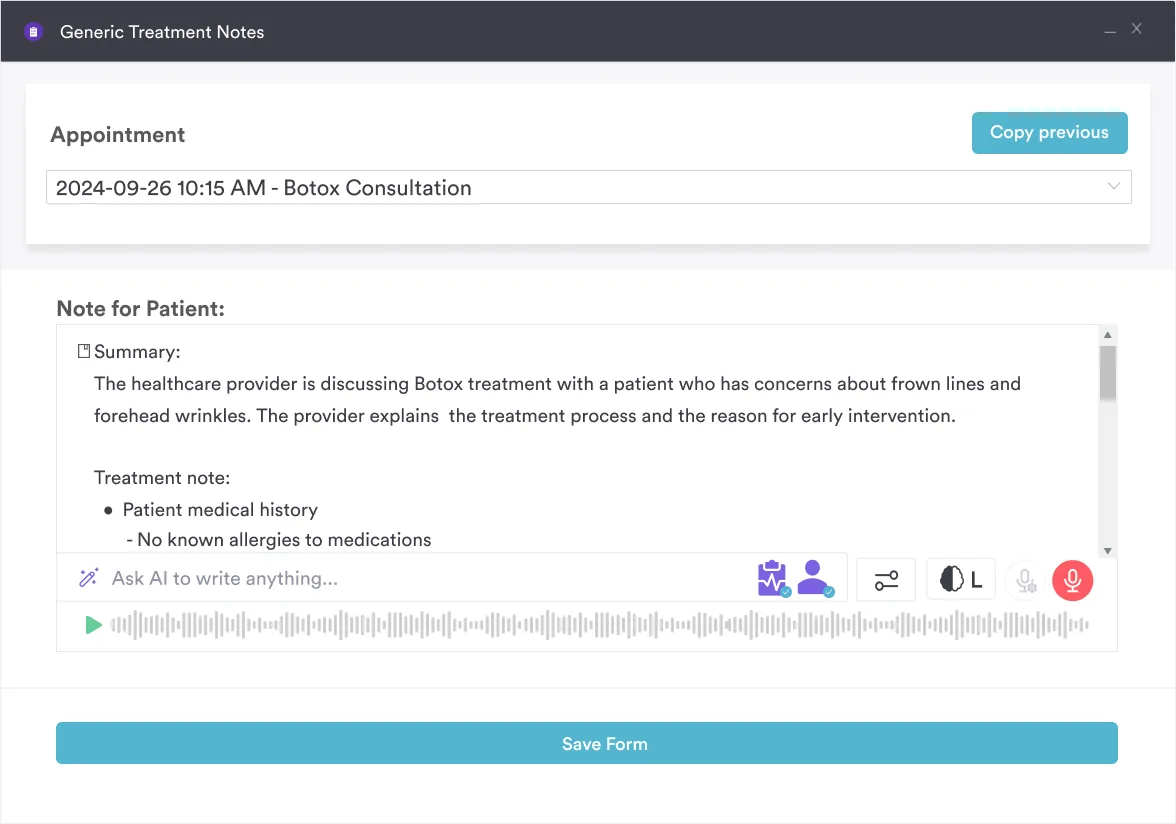
For post-operative patients or those with COPD, asthma, or fibrosis, pre- and post-care templates can carry respiratory assessment fields as standard. The checklist above then becomes part of the clinical workflow rather than a separate paper exercise.
Audit trails and templated charting also help practices meet Joint Commission or CQC-aligned documentation standards. They reduce the risk of incomplete respiratory assessment records reaching an inspector.
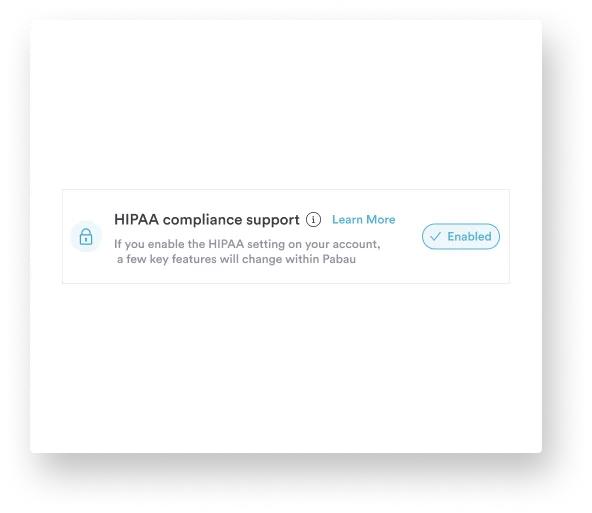

Pabau’s structured clinical templates and AI scribe help nurses capture assessment findings consistently and cut charting time. See how it works for your practice.

Run the four techniques in the same order every time, and compare left to right at each level. That habit catches the subtle asymmetry a one-side-first assessment skips over.
The bigger risk sits in the chart. A note that only says “crackles” gives the next nurse nothing to compare against. Record phase, site, and response to coughing every time, and escalate on the thresholds rather than on instinct.
Structured forms make that level of detail the default instead of an extra step. Book a demo to see how Pabau turns your respiratory checklist into a structured, searchable note.

Assessing a patient with suspected pneumonia? Nursing diagnosis for pneumonia covers the NANDA care plans and interventions that follow abnormal lung findings.
Need a structured form for acute care? Emergency nursing assessment template walks through a complete clinical assessment for emergency settings.
Want your respiratory notes to hold up to review? Nursing documentation explains the principles, best practices, and legal requirements behind every chart entry.
Charting findings by problem rather than by system? Focus charting (F-DAR) shows how to write nursing notes that stay concise and defensible.
Collecting respiratory history before the visit? Digital patient intake forms explains how to get forms completed before the appointment.
A nursing lung assessment is a structured clinical examination of the thorax and respiratory system using four techniques in sequence: Inspection, palpation, percussion, and auscultation. Nurses perform it to establish baseline respiratory status, detect pathology, and monitor for deterioration across all care settings.
A nursing lung assessment follows four steps in order. Inspection covers rate, pattern, symmetry, and distress, and palpation checks chest expansion and tactile fremitus. Percussion tests resonance to detect consolidation or effusion. Auscultation listens for normal and adventitious sounds at all anterior, lateral, and posterior sites.
Normal lung sounds include vesicular (soft, inspiratory-dominant, heard over peripheral lung fields), bronchial (loud, over the trachea), and bronchovesicular (medium-pitched, at sternal borders). Abnormal adventitious sounds include crackles (fluid or fibrosis), wheezes (airway narrowing), rhonchi (secretions in large airways), stridor (upper airway obstruction), and pleural rub (pleural inflammation).
Nurses document lung assessment findings using specific, structured language that records the technique, site, quality, and phase of any finding. For example: “Fine inspiratory crackles at bilateral lung bases, not cleared by coughing.” SOAP note structure (Subjective, Objective, Assessment, Plan) is standard, and EHR templates with structured fields improve consistency and reduce free-text variability.
The mMRC (modified Medical Research Council) dyspnea scale is a validated five-grade tool (0 to 4) for breathlessness. It grades patients by the level of exertion that triggers it. A score of 2 indicates the patient walks more slowly than peers or stops for breath after a short distance. GOLD guidelines recommend it as part of COPD assessment. It supplements objective findings from the nursing lung assessment but does not replace clinical judgment.
Pediatric patients have higher baseline respiratory rates, up to 60 breaths per minute in neonates. They compensate for respiratory failure through increased work of breathing before SpO2 drops. Their distress signs include nasal flaring, grunting, and subcostal retractions. Age-specific normal ranges must be used, and a silent chest in a child with asthma is a medical emergency regardless of apparent SpO2 stability.