GLP-1 diet plan
A GLP-1 diet plan is a structured eating framework for patients taking semagluti...

2
Last Updated: Oct 13, 2026

A rapid trauma assessment is a head-to-toe exam completed in 30 to 60 seconds on patients with a significant mechanism of injury or altered responsiveness.
The ABCDE primary survey comes first, and each life threat it finds is treated before the head-to-toe exam begins.
DCAP-BTLS gives you a fixed order for checking seven body regions, from the head down to the posterior.
Practice management software like Pabau stores completed assessment forms on the client record, so field findings travel with the patient.
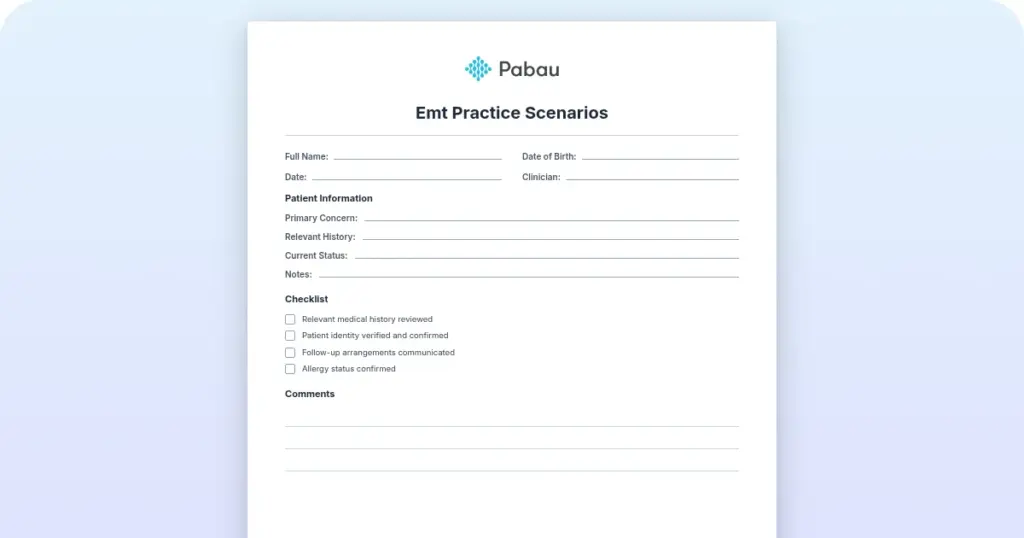
A printable checklist covering scene size-up, the ABCDE primary survey, and head-to-toe DCAP-BTLS findings. It also carries fields for vital signs, SAMPLE history, and the secondary survey.
Download templateA rapid trauma assessment is a 30 to 60 second head-to-toe exam that finds life-threatening injuries on a trauma patient. It runs after the ABCDE primary survey, and only on patients with a significant mechanism of injury or altered responsiveness.
This guide walks through the sequence stage by stage, from scene size-up to the secondary survey. It explains DCAP-BTLS, sets ABCDE against the tactical MARCH framework, and hands you a printable checklist that mirrors the NREMT skill sheet.
Use it to prepare for the NREMT exam, to run skills practice, or to standardize how your crews record what they find.
A rapid trauma assessment (RTA) is a systematic head-to-toe physical exam for patients with a significant mechanism of injury or no response. It is built to take under 60 seconds and to surface injuries that need treatment before transport.
EMTs and paramedics perform an RTA after the primary survey, once no immediate airway, breathing, or circulatory threat remains. The exam follows the DCAP-BTLS mnemonic, which fixes the order in which you check each body region. That order is what separates it from a focused assessment, used when the patient has one clear complaint or a localized injury.
Crews new to the sequence often practice it alongside the broader EMT patient assessment, which covers medical calls as well as trauma.
Before performing a rapid trauma assessment, every EMS provider completes a primary survey using the ABCDE framework. This sequence finds and manages the threats that can kill a patient within minutes.
Anything life-threatening at one step gets treated before you move to the next letter. Only once the primary survey is clear do providers open the rapid trauma assessment. The disability step is where scoring drifts most between crews, so a printed AVPU scale next to the GCS chart keeps the language consistent.
Primary survey notes and RTA findings belong on one record rather than two. Good medical records management keeps them together, so the receiving team reads the whole prehospital trajectory in order.
The exam follows a head-to-toe sequence, applying DCAP-BTLS at each anatomical region. The order below is fixed, and each stage gates the one after it.
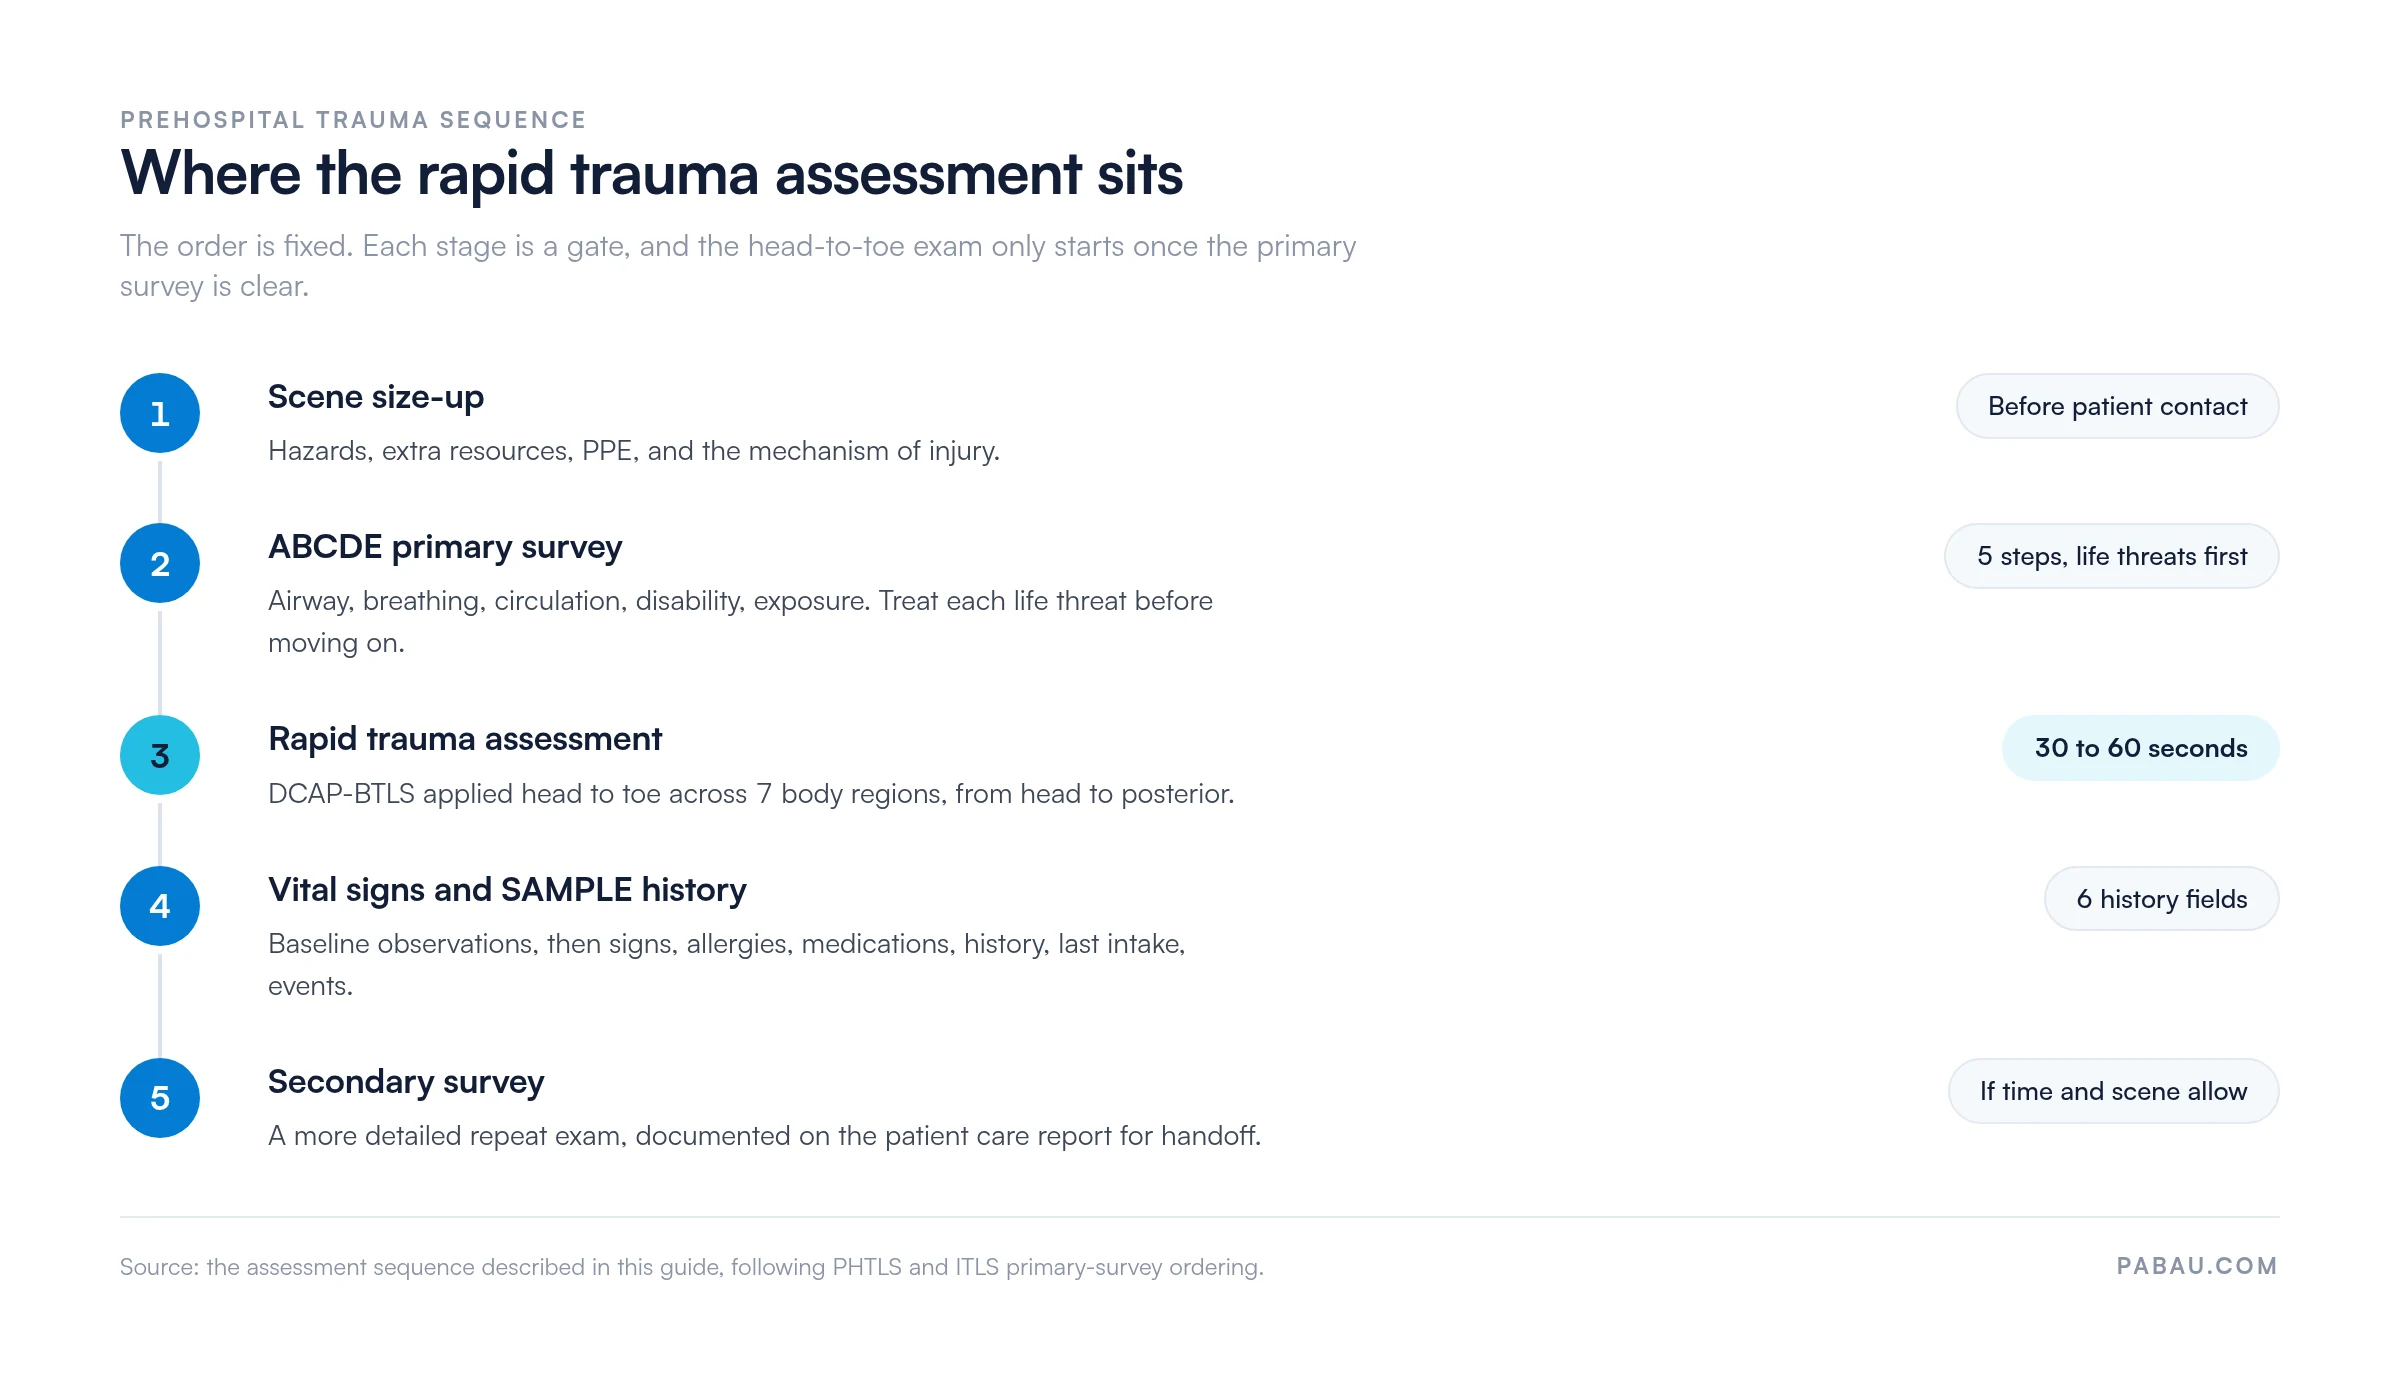
Before patient contact, identify hazards, call for more resources if you need them, and put on the right PPE. Then assess the mechanism of injury (MOI), meaning the forces and directions that caused the trauma.
High-energy MOI calls for an RTA even when the patient looks well. That includes rollovers, ejections, pedestrians struck at speed, falls over 20 feet, and penetrating trauma to the head, neck, or torso. Radio the MOI ahead so the trauma team is ready on arrival.
DCAP-BTLS stands for Deformities, Contusions, Abrasions, Punctures or penetrations, Burns, Tenderness, Lacerations, and Swelling. Apply the same checklist as you inspect and palpate each region:
Document every positive finding on the digital or paper template as you go. Recall degrades fast once the crew moves to packaging and transport.
Record baseline vitals: blood pressure, heart rate, respiratory rate, temperature, oxygen saturation, and glucose where it is indicated. A standard vital signs record makes the trend readable when you repeat the set in transit.
Then take a rapid SAMPLE history. The six fields are signs and symptoms, allergies, medications, pertinent medical history, last oral intake, and the events leading to the injury. The last field often explains a finding the exam alone cannot.
Once the RTA is done and the patient is packaged for transport, perform a secondary survey if time and scene safety permit. This repeats the head-to-toe exam with more specificity: range of motion in the joints, a second neurovascular check, and a fuller patient history.
The secondary survey goes on the patient care report (PCR) and is handed to the receiving facility. It is also where a finding you flagged as tender in the field gets described properly.
During the head-to-toe exam, classify fractures by urgency. Life-threatening fractures such as a femur, or a pelvis with hemodynamic instability, need immediate splinting and rapid transport. Limb-threatening fractures with neurovascular compromise need a distal pulse check and a motor and sensory check, and repositioning if pulses are absent.
Stable fractures such as an isolated clavicle or an ankle are splinted and managed at a lower priority.
ABCDE is the standard civilian EMS primary survey. MARCH stands for massive hemorrhage, airway, respiration, circulation, and hypothermia. It is the tactical framework used by combat medics and tactical EMS teams in high-threat settings.
MARCH puts massive external hemorrhage first because military casualties often die of preventable bleeding before definitive care. Civilian protocols keep ABCDE because the airway is the immediate priority in most non-combat trauma.
Pre-Hospital Trauma Life Support (PHTLS) is sponsored by the National Association of Emergency Medical Technicians. International Trauma Life Support (ITLS) is the other major accredited program. Both teach the primary survey, the rapid exam, and the secondary survey against Advanced Trauma Life Support (ATLS) standards.
PHTLS courses lean on field treatment decisions driven by mechanism of injury and the resources on scene. ITLS leans harder on systematic assessment, communication, and teamwork. Both are recognized by the National Registry of Emergency Medical Technicians (NREMT), and most agencies expect one of them as continuing education.
The downloadable file mirrors the NREMT skill sheet layout, which makes it useful for training programs, skills labs, and field protocols. Five steps put it to work:
The file does two jobs: a training checklist during skills practice, and a documentation tool in the field. Some agencies laminate printed copies for the ambulance, while others fill in a tablet version as they go.
Pro tip: Practice the sequence until it is muscle memory. Time yourself on a partner until you can finish a full head-to-toe exam in under 60 seconds. Shorter scene times get the patient to the right facility sooner.
Most crews still write the assessment on paper, then re-key it into a patient care report at the end of the shift. Findings get shortened, timestamps drift, and the sheet that went to the hospital is not the sheet the agency keeps.
Practice management software like Pabau takes a different route. You rebuild this checklist once as a digital form, and the crew fills it in on a phone or tablet at the patient’s side. The completed form saves straight onto the client record with the vitals, the photos, and the timestamps attached.
The result is one record instead of three. Receiving clinicians read the same findings the crew entered. Quality reviewers pull any call in seconds, and nobody retypes a soggy sheet after a late shift.

Pabau turns your assessment checklists into digital forms that save straight onto the client record. Findings, vitals and timestamps stay together, so handoff and quality review both take minutes instead of an evening.

The hard part of a rapid trauma assessment is not the anatomy. It is holding the order under pressure, so the head-to-toe exam never starts before ABCDE is clear and never runs past a minute.
Print the checklist, run it on a partner until the sequence is automatic, then keep a copy in the ambulance. Crews that use the same sheet every call write handoffs the hospital can act on without a phone call back.
The trade-off worth remembering is speed against completeness. You buy speed with a fixed order, not by skipping regions, which is why the sheet is laid out the way it is. Book a demo to see how Pabau keeps these assessments on the client record from the field to the handoff.

Working an emergency department intake instead? Emergency nursing assessment covers the same patient once the crew has handed over.
Need to write the call up afterwards? EMS chart narrative shows how to turn your assessment findings into a defensible written report.
Scoring responsiveness on scene? Level of consciousness assessment sets out how to grade and record what you find at the disability step.
Burns in the head-to-toe exam? Body burn percentage chart helps you estimate the surface area involved before you call it in.
Moving your agency off paper? Clinical documentation software explains what to look for when assessment forms have to reach a shared record.
It is performed after the ABCDE primary survey, on trauma patients who are unresponsive or have a significant mechanism of injury. EMTs, paramedics, and other first responders run it during prehospital care. The exam takes under 60 seconds and looks for injuries needing immediate treatment or rapid transport.
It should take 30 to 60 seconds. That speed comes from practice and from knowing the DCAP-BTLS order well enough not to think about it. Providers who train regularly finish a complete head-to-toe exam without missing findings.
DCAP-BTLS stands for Deformities, Contusions, Abrasions, Punctures or penetrations, Burns, Tenderness, Lacerations, and Swelling. Providers apply the same checklist at each body region, which is what keeps the exam systematic under pressure.
A rapid exam covers the whole body and is used on any trauma patient with a significant mechanism of injury or altered mental status. A focused assessment targets one area based on the patient’s complaint or injury history, such as an ankle after a fall. Use the focused version when the MOI is low-energy and the patient is responsive with a clear complaint.
ABCDE is the primary survey, and it runs before the head-to-toe exam. It prioritizes Airway, Breathing, Circulation, Disability, and Exposure so life threats get treated first. Only once ABCDE is complete and every immediate threat is managed do providers begin the head-to-toe exam.
Yes. The template at the top of this page is a free PDF you can print for training, field use, or skill practice. It covers scene size-up, the ABCDE primary survey, the DCAP-BTLS head-to-toe exam, vital signs, SAMPLE history, and the secondary survey, aligned with NREMT standards.