CRM for chiropractors: how to manage patients, bookings and marketing
A CRM for chiropractors is a patient relationship management system built around...

Last Updated: Oct 13, 2026

The eversion stress test checks the deltoid ligament complex, the main medial stabilizer of the ankle.
Perform it by stabilizing the tibia and fibula with one hand and applying a steady valgus force through the calcaneus and forefoot with the other, then interpret findings by comparing medial gutter pain and laxity against the uninjured ankle.
A positive result means medial gutter pain, valgus laxity greater than the other ankle, or both.
Grading the finding from I to III guides treatment, and a suspected Grade III needs MRI or a stress radiograph.
Practice management software like Pabau lets physical therapy and sports medicine practices record ankle findings inside the client record.
Most ankle sprains involve the lateral ligaments, so medial injuries get far less attention. A missed deltoid ligament rupture can leave a patient with chronic instability, a long rehabilitation, and a failed return to sport. The eversion stress test is the clinical tool that catches deltoid damage first.
This guide covers how to perform the test accurately and how to read the finding at each severity grade. It also shows how the test fits alongside the other ankle assessments used in physical therapy and sports medicine.
The eversion stress test is an orthopedic assessment of the deltoid ligament complex on the medial side of the ankle. You apply a valgus (eversion) force to the foot while stabilizing the distal leg. Pain or increased gapping on the medial side is a positive finding.
The test is also called the valgus stress test of the ankle. It belongs to the group of ankle ligament stress tests used across the foot and ankle exam. Those tests separate medial from lateral injury and screen for syndesmotic involvement.
The deltoid ligament is the primary restraint to valgus stress and external rotation of the talus. It originates on the medial malleolus and fans out in two layers, each with its own bony attachments.
The deep layer is the more important stabilizer. Isolated superficial tears produce less instability than deep layer involvement, which is what drives the Grade I to III spectrum below. The deltoid ligament also works with the distal tibiofibular syndesmosis to hold the talus in the mortise.
Medial ankle injuries are underdiagnosed because they often travel with a lateral sprain after an inversion mechanism. Perform the eversion stress test whenever medial involvement is a possibility.
Before you apply stress, work through the Ottawa Ankle Rules to decide whether radiographs are needed. Stress testing is contraindicated until fracture has been excluded. In a sports medicine practice, the test usually sits in a standard ankle battery with the anterior drawer and talar tilt tests.
Technique consistency decides whether the finding means anything. Small changes in foot position or force direction alter what the test loads. They also decide whether two clinicians get the same result.
Assess the uninjured ankle first. Bilateral hyperlaxity is common, and grading only the symptomatic side produces false positives. A baseline on the good ankle makes asymmetric laxity obvious the moment you feel it.
Two separate findings can make the test positive. One is pain provocation and the other is mechanical laxity. They can appear together or alone, and each carries different clinical weight. Graded ligament exams at other joints are read the same way. The DRUJ ballottement test, for instance, compares ulnar head translation against the uninjured wrist.
A negative test does not rule deltoid pathology out. Sensitivity is moderate, and a significant deep layer tear can sit behind an exam that feels stable. Where suspicion stays high, send the patient for MRI or a stress radiograph and file the ankle radiograph results with the exam note.
The table below maps eversion stress test findings onto the standard ligament sprain grades. It follows orthopedic classification criteria from the American Orthopaedic Foot and Ankle Society (AOFAS).
Grade III injuries often travel with syndesmotic disruption or a medial malleolus fracture, so the Danis-Weber classification is worth checking against the radiograph. Any suspected Grade III finding should trigger imaging before you plan a return to activity.
Primary research on the standalone accuracy of the eversion stress test is thin. What exists in the musculoskeletal physical therapy literature suggests moderate sensitivity and variable specificity. Much depends on how a positive result is defined, whether that is pain alone, laxity alone, or both.
The figures above come from the Journal of Orthopaedic and Sports Physical Therapy (JOSPT). Read them in context, because accuracy values for manual stress tests swing with examiner experience, patient population, and reference standard. The test earns its diagnostic power in combination with history and imaging.
The eversion stress test is one of four principal ankle ligament assessments. Which one you reach for depends on the mechanism of injury and the structure under suspicion.
The talar tilt test loads the calcaneofibular ligament and, secondarily, the anterior talofibular ligament (ATFL). The patient sits as they do for the eversion stress test. You then apply an inversion force to the calcaneus while stabilizing the tibia.
A positive finding is increased talar tilt against the other side, which indicates lateral ligament laxity. The talar tilt does not load the medial structures, so use it when a lateral sprain is the main concern.
The anterior drawer test targets the ATFL by translating the talus forward within the mortise. Position the foot in 10 to 20 degrees of plantarflexion to isolate ATFL tension. Anterior translation of more than 3 to 5 mm against the other side indicates ATFL insufficiency, as does a sulcus sign.
This test is the lateral counterpart to the eversion stress test in a full ankle battery. Research in the British Journal of Sports Medicine supports pairing the anterior drawer with the talar tilt when lateral instability is suspected.
Kleiger’s test applies an external rotation force to the foot with the knee flexed to 90 degrees. It loads the syndesmosis and the deep deltoid ligament rather than driving the foot into valgus. Pain at the anterolateral ankle or syndesmosis is positive, and medial pain from deltoid tension counts too.
Reach for Kleiger’s test when a high ankle sprain is likely, especially after a rotational mechanism. The two tests are often run together, because both implicate the deltoid complex through different force vectors.
A positive eversion stress test does not confirm an isolated deltoid injury on its own. These conditions share the medial ankle presentation.
Where syndesmotic injury stays on the list, the heel thump test adds another bedside screen. An axial strike to the heel is positive when pain appears at the anterolateral ankle, above the joint line.
Ankle stress test findings are often recorded loosely, which makes them hard to track across an episode of care. A vague note also travels badly on referral. The safer clinical notes framework asks for the objective finding and the clinical context that explains it.
A complete eversion stress test entry in a SOAP note should carry:
The same entry supports the diagnosis code that goes out on the claim. A tarsal ligament sprain coded as S93.619A should match the finding recorded above it. Carrying that detail into clinical progress notes keeps the record consistent from first assessment to discharge.
Ankle assessments are often captured on a paper proforma, then retyped into the record later that day. Detail drops out in the retyping, and the comparison against the other ankle is usually first to go.
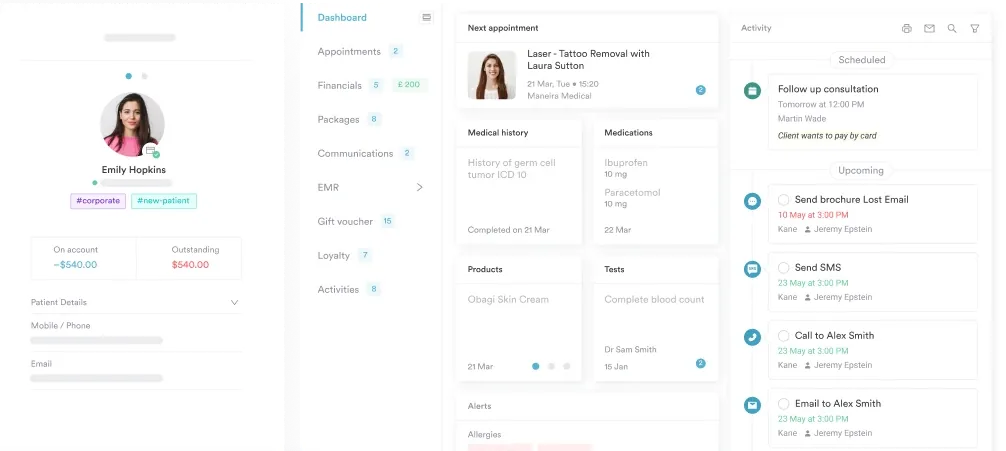
Practice management software like Pabau replaces that round trip. You build the ankle battery once as a digital intake form, with fields for pain score, laxity grade, side compared, and imaging status. The practitioner completes it at the plinth, and the entry lands in the client record with a timestamp.
That gives you a dated series rather than a pile of loose notes. When the patient returns at week six, the original grade sits next to the current one. Progress through a return-to-running protocol is then easy to justify to the patient and to an insurer.

Pabau lets physical therapy and sports medicine practices build custom assessment forms, record findings straight into the client record, and track outcomes over time. It all happens in one workflow.

The eversion stress test takes under a minute, and skipping it is what turns a medial sprain into a six-month problem. Run it on every ankle where medial symptoms show up, even when the mechanism looks purely lateral.
Grade the finding rather than logging it as positive or negative. A Grade I ankle can start loading this week. A suspected Grade III needs imaging before anyone talks about return to sport. That one decision changes the whole rehabilitation plan.
Whatever you find, write it down in a form the next clinician can use. Book a demo to see how Pabau keeps ankle findings, imaging status, and rehabilitation progress in one client record.

Working through another orthopedic special test? Yocum test walks through shoulder impingement testing with the same performance and documentation structure.
Need a decision rule for ankle imaging? Bernese Ankle Rules covers an alternative to the Ottawa rules for deciding when a radiograph is warranted.
Assessing a ligament stress test higher up the chain? Alar ligament test explains cervical stability testing, interpretation, and what to record.
Wondering what massage therapists earn? Massage therapist salary guide cites BLS data putting the median massage therapist wage at $57,950 as of 2024.
Screening for non-organic leg weakness? Hoover test gives you a free template plus the technique for interpreting the result.
The eversion stress test assesses the deltoid ligament complex, the medial collateral ligament of the ankle. A valgus force is applied to the foot while the leg is stabilized. Medial gutter pain or increased valgus laxity indicates a deltoid sprain or rupture.
A positive result means medial gutter pain, valgus laxity greater than the other ankle, or both. Pain on its own suggests a minor sprain. Laxity with pain suggests partial or complete deltoid disruption that needs further investigation.
The eversion stress test applies a valgus force to load the medial deltoid ligament. The talar tilt test applies an inversion force to load the lateral calcaneofibular and anterior talofibular ligaments. They are complementary tests on opposite sides of the ankle.
Kleiger’s test applies an external rotation force that loads the syndesmosis and the deep deltoid ligament. The eversion stress test applies a direct valgus force instead. Kleiger’s test is more specific for a high ankle sprain after a rotational mechanism.
Primary data on the standalone accuracy of the eversion stress test is limited. The available physical therapy literature suggests moderate sensitivity and specificity. Values shift depending on whether pain, laxity, or both count as positive, so pair the test with history and imaging.
Use it whenever medial involvement is suspected after an ankle sprain, and whenever medial pain persists after an apparently lateral injury. It also belongs in return-to-sport clearance. Apply the Ottawa Ankle Rules first to exclude fracture before any stress testing.