Head to toe assessment cheat sheet: Printable nursing guide
A head to toe assessment cheat sheet gives you one fixed order at the bedside, s...

2
Last Updated: Oct 23, 2026

Ober’s test screens the iliotibial band and tensor fasciae latae for tightness, using passive hip adduction in side-lying.
The test is positive when the tested leg fails to drop to the horizontal plane after release.
The modified version keeps the knee straight and allows more hip adduction than the standard version.
Pelvic stabilization is what makes the result reproducible, so most misleading findings trace back to technique.
Treat a positive result as a prompt for gluteal strengthening and load review, not as a diagnosis.
A runner comes in with pain on the outside of the knee that spikes on downhills and settles overnight. Ober’s test is usually the first thing a clinician reaches for. It is also one of the easiest orthopedic tests to perform badly.
Let the pelvis roll back a few degrees and a tight hip looks normal. Release the leg too quickly and momentum carries it below horizontal. The movement itself takes 20 seconds, so the accuracy lives in the setup, the stabilizing hand, and what you write down afterward.
Neither version of the test diagnoses anything on its own, which is exactly why technique and documentation carry so much weight.
Ober’s test measures how far the hip can passively adduct before soft tissue stops it. The structures under load are the iliotibial band, known as the IT band, and the tensor fasciae latae (TFL). Dr. Frank Ober described the test in 1936, in a paper on the IT band’s role in low back and sciatic pain.
The mechanics are simple. You put the hip into abduction and extension, then let go, and gravity does the adducting. If the IT band and TFL are tight, the leg hangs above the horizontal plane instead of dropping past it.
That pattern shows up most often in runners and cyclists with lateral knee pain. IT band syndrome (ITBS) is the usual suspect, which is why physical therapy practices screen for it so often.
The IT band is a thick sheet of fascia running down the lateral thigh, from the iliac crest to Gerdy’s tubercle on the tibia. It has no muscle belly of its own. The TFL and gluteus maximus feed into it from above, so tension in either one travels the whole length of the band.
The TFL starts at the anterior superior iliac spine (ASIS) and the anterior iliac crest. It flexes, abducts, and internally rotates the hip. When it tightens or overworks, it pulls tension through the IT band. That compresses lateral structures at the knee, right around 30 degrees of flexion, which is the spot patients point to in ITBS.
Gluteus medius weakness is the other half of the picture. A weak gluteus medius pushes the TFL into a stabilizing role it was not built for, and the TFL stiffens in response. Ober’s test cannot tell you which came first, so sports medicine teams pair it with strength testing before deciding what to treat.
Set up carefully, then release. The steps below describe the standard version, with the knee flexed to 90 degrees. Writing the sequence into your assessment template, whether on paper or in practice management software, keeps clinicians consistent between sessions.
The whole thing should feel unhurried. Your job is the stabilizing hand and the observation, and the patient’s job is to stay relaxed.
Melchione and Sullivan described the modified Ober’s test in 1993. The setup is identical, except the knee stays fully extended instead of flexed to 90 degrees. That one change alters the number you record.
Expect more adduction on the modified version, not less. Reese and Bandy measured both versions with an inclinometer. They recorded significantly greater hip adduction with the knee extended, in a 2003 Journal of Orthopaedic and Sports Physical Therapy (JOSPT) paper.
Neither version wins outright. The modified test gives a cleaner read on IT band length, while the standard test is the one most clinicians were taught. Pick one, use it for every patient, and note which one you used, otherwise your serial measurements are not comparable.
A positive Ober’s test tells you the lateral tissue is short. It does not tell you why, and it does not name a diagnosis. Tracking patient measurements across a plan of care only helps if every clinician applies the same criterion.
The leg fails to reach or pass the horizontal plane of the table after release. That points to reduced extensibility in the IT band, the TFL, or both. It turns up often in runners, cyclists, and military recruits carrying heavy training loads.
What the finding does not do is confirm ITBS. Tightness is a measurement, not a lesion. Pair it with symptom location, aggravating activities, palpation, and at least one provocation test before you commit to a clinical impression.
There is no agreed cutoff angle in the literature. The working criterion is straightforward. A leg that adducts to or below horizontal counts as negative, and a leg that never reaches horizontal counts as positive. Some sources add a number, treating restriction of more than 10 degrees from full adduction as positive.
That threshold is not consistently adopted, so record which criterion you applied. On the modified version, asymptomatic subjects have averaged roughly 5 to 15 degrees below horizontal, with wide variation between people. A goniometer or inclinometer turns that into a baseline you can re-test against, which matters more than any population cutoff.
Reliability rises and falls with pelvic control. Studies of inter-rater and intra-rater reliability report anywhere from moderate to acceptable agreement, and the spread tracks how tightly each study controlled the pelvis. When examiners let the pelvis drop or rotate, reproducibility falls away.
Validity is narrower than the test’s reputation suggests. Using it as an IT band and TFL tightness screen sits on reasonable ground. As a measure of pelvic asymmetry it does not, and the literature still treats that use as an open question.
Not much, honestly. Formal diagnostic accuracy data for Ober’s test is thin next to better-studied hip and knee tests. Sensitivity for detecting IT band tightness in symptomatic patients looks moderate, while specificity suffers because plenty of asymptomatic people also test tight.
So treat it as a screen and a monitoring tool. A positive result raises your suspicion of IT band involvement. Ruling ITBS out takes more than a negative result, and neither answer replaces the rest of the examination.
Most misleading Ober’s test results come from technique rather than pathology. Each of the five below is preventable in the setup phase.
Recording the version, the release position, and how the pelvis behaved turns a subjective observation into something a colleague can repeat. That also keeps your patient care documentation defensible if the record is ever reviewed.
Before you start, palpate the ASIS and the posterior superior iliac spine (PSIS) to confirm the pelvis is level. If it is already rotated or tilted, the adduction measurement will be wrong before you touch the leg. That landmark check takes under 10 seconds and heads off the most common source of false results.
Ober’s test sits in the middle of the examination, not at the start. History and observation come first, then gait if the patient can walk, then strength testing, then the passive length tests. By the time the patient is side-lying, you should already have a hypothesis to confirm or drop.
The test is not billed on its own. It is one element inside the evaluation, so the note has to support the complexity you claimed under an evaluation code such as 97162. Whether you write SOAP notes or fill in a structured template, the finding needs a number, a side, and a version.
A quick pre-test check catches most of what goes wrong. Before you release the leg, confirm all five:
Two things trip practices up after the test rather than during it. One is a note that says only that the test was positive, with no angle, which makes the four-week re-test meaningless. The other is a re-test run by a different clinician using the other version. That produces a change with nothing to do with the patient.
Both problems disappear once the fields are fixed rather than freehand. Practices that standardize this in clinical documentation software stop losing the angle, because the field is there whether the clinician remembers it or not.
Use Ober’s test when lateral hip or knee pain is activity-related and worse with sustained running or cycling. Palpation of the IT band or the lateral retinaculum should reproduce it. The common scenarios:
In every one of those scenarios, the context matters as much as the angle. Record which limb you tested, what the patient felt during the lowering phase, and any compensation you saw. That detail is what shapes the plan.
No single test closes out a lateral hip and knee assessment. Here is how Ober’s test sits next to the others you would run in the same session. The same layered approach applies to spinal screens like the passive lumbar extension test.
Ober’s test and the Noble compression test work best as a pair. One finds the tightness, the other provokes the pain at the lateral femoral epicondyle. Add the Thomas test when the history points anteriorly, because TFL and hip flexor tightness usually travel together.
A positive result starts the plan, it does not finish it. Treat the tight tissue and the movement pattern that made it tight, or you will be re-testing the same angle in six weeks. Return-to-running protocols often use the Ober angle as one readiness check before load goes back up.
Serial numbers are what make that pathway work. An unchanged adduction angle at four weeks should trigger a review of the plan. Structured patient records keep that number where the next clinician will see it, rather than buried in a session note.
Most practices record special test findings in free text. The version, the angle, and the pelvic notes get phrased differently by each clinician. Charting a trend across six visits then means reading every note in full.
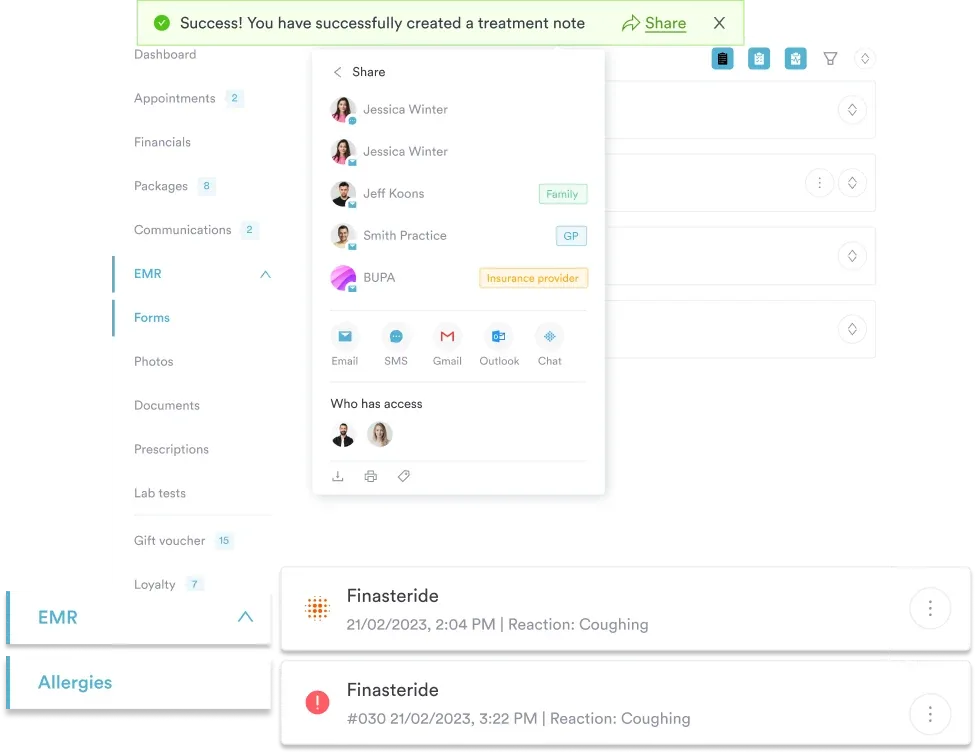
Practice management software like Pabau handles that differently. You build the Ober’s test fields once into a digital assessment form. Every clinician then records the same three data points in the same place, and the measurements sit on a timeline you can open mid-appointment.
The result is a re-test that means something. When the angle has not moved at four weeks, that shows as a flat line rather than a hunch. You can change the plan while the patient is still in front of you.

Pabau gives physical therapy and sports medicine teams structured forms for special tests, measurement tracking across visits, and automated appointment reminders. That turns a four-week re-test into a straight comparison.

Ober’s test earns its place because it takes 30 seconds and points you somewhere useful. What it cannot survive is sloppy technique. A pelvis that rolls, a hip left in flexion, or a quick release will each hand you a number that means nothing.
So pick one version, guard the pelvis like it is the test itself, and write the angle down every time. Do that and three small data points start telling you whether your plan is working, patient by patient. Book a demo to see how Pabau keeps special test findings and measurements in one record your whole team can read.

Assessing the shoulder in the same session? Full can test walks through the procedure, the interpretation, and what the accuracy data supports.
Screening for joint hypermobility as well? Hospital del Mar criteria scores 10 items across the hands, limbs, and skin, and sets the tool against the Beighton score.
Screening for fall risk instead? Functional reach test runs in five minutes and gives fall risk cut-offs, plus the setup mistakes that skew scores.
Tracking aerobic fitness alongside mobility? Harvard step test recording sheet gives you a printable sheet for pulse counts and fitness index scores.
Need the history captured before the first visit? Physical therapy intake form covers symptom history, red flags, and consent in one document.
It should not. Expect a pulling or tight feeling on the outside of the hip and thigh as the leg lowers. Sharp pain, groin pinching, or back pain means stop and reassess.
No. The leg has to fall passively while someone else holds the pelvis still, and you cannot do both jobs at once. Self-stretching the same tissue is useful, but it will not give you a measurement.
Test the unaffected side first. It gives you a within-patient comparison before pain or guarding influences the result, and it shows the patient what the movement feels like.
Every three to four weeks is enough during a plan of care. Repeat it with the same version, the same knee angle, and ideally the same examiner, or the change you see may be measurement noise.
Often yes, in the short term. Rolling the lateral thigh can free up a few degrees of adduction straight away. That usually reflects reduced tissue sensitivity rather than a lasting length change.