GLP-1 diet plan
A GLP-1 diet plan is a structured eating framework for patients taking semagluti...

2
Last Updated: Oct 13, 2026

The functional reach test measures how far a patient can reach forward without moving their feet.
Duncan and colleagues published it in 1990, and it still takes about five minutes to run.
Under 6 inches signals high fall risk, 6 to 10 inches moderate, and above 10 inches low.
You average three valid trials, using a yardstick taped to the wall at the patient’s shoulder height.
Practice management software like Pabau stores every trial, charts the trend, and flags a score that drops.
Ask a patient to reach for something on a high shelf and you learn more about their balance than any conversation will. The functional reach test turns that moment into a number you can chart. It measures the furthest a person can reach forward while both feet stay planted.
That number carries weight. Falls are the leading cause of injury-related death among adults aged 65 and older, according to CDC falls data. A short reach flags the patient who needs a balance program now, rather than at some later review.
The test itself needs a yardstick and a clear wall. Consistency is the harder part. Small changes in foot position or arm height move the score by more than you would guess. The protocol below is worth following to the letter.
The functional reach test measures dynamic standing balance. It records how far a patient reaches forward past arm’s length while keeping a fixed base of support. Pamela Duncan and colleagues published it in 1990 as a fast screen for balance problems in older adults living at home.
The logic behind it is simple. To reach further, a patient has to shift their center of mass toward the edge of their base of support. Staying upright out there takes postural control. So a short reach points to a small margin of stability, and a small margin is what turns a stumble into a fall.
Since then the test has been studied in stroke survivors, long-term care residents, and patients with Parkinson’s disease. Its appeal is what it leaves out. No stopwatch, no walkway, no cognitive task.
The original paper is worth a look for the source data. Duncan PW, Weiner DK, Chandler J, Studenski S. “Functional reach: a new clinical measure of balance.” J Gerontol. 1990;45(6):M192-M197.
Setup takes about 30 seconds, and it decides whether the score means anything. Here is the whole kit:
Before the patient stands up, run through four quick questions. They take longer to read than to ask.
One detail catches people out. Mount the yardstick at the acromion of the patient in front of you, not at a height you set once for the room. Reach is measured from their own shoulder, so the reference point has to follow them.
With the wall set up, the protocol runs in two short stages. Read the steps out as instructions if it helps the patient stay with you.
Give patients with low endurance a short rest between trials. Most older adults are done inside five minutes.
Say a 78-year-old arrives after stumbling on the stairs. Her baseline knuckle position reads 24 inches.
Her average is 6.5 inches, which lands in the moderate band and sits close to the high-risk line. All three valid trials go in the note, along with the void attempt and the reason for it. Next session, that detail is what tells you whether she has genuinely improved.
Scores drift between sessions for reasons that have nothing to do with the patient. These five account for most of it:
None of these are exotic. Together, though, they explain most scores that swing 2 inches with no clinical change behind them.
Duncan’s original normative data came from adults aged 20 to 87 living in the community. The table below reflects those values. It applies to the standing test only, because the seated version has its own norms.
Treat these as community figures, because that is where they came from. Long-term care residents and patients with neurological conditions usually score lower, so use clinical judgment before you call a score abnormal.
Full tables, with confidence intervals and reliability figures, sit in the Shirley Ryan AbilityLab measures database.
Under 6 inches is the number to remember. Duncan’s 1992 follow-up work produced the cut-offs still used in practice today, and they were built for older adults.
Apply them carefully to anyone younger, and never to the seated version.
The bands are useful, but they are not a verdict. A patient below 6 inches carries roughly four times the fall risk of someone above 10, per Duncan’s follow-up data. Read that alongside the history, the medication list, and a broader fall risk assessment, rather than on its own.
Record footwear, foot position, and any void trial next to the score itself. Without those details, a 1-inch change next month is impossible to interpret, and the case for continued therapy gets weaker. Keep the yardstick height and foot width identical at every session.
The test has held up for more than three decades because its measurement properties are strong. Two clinicians testing the same patient will usually land within a fraction of an inch of each other.
Reliability figures shift with the population and the setting. If you are reporting them for research or a quality project, cite the specific study rather than the range.
The standard test needs a patient who can stand safely. When that is off the table, the modified functional reach test (mFRT) measures the same idea from a seated position. Lynch, Leahy and Barker published the seated version in 1998, in a study of patients with spinal cord injury.
The seated version earns its keep in stroke and Parkinson’s caseloads, where standing balance testing is not yet safe. You can read the original reliability data in Phys Ther. 1998;78(2):128-133.
Because both versions often sit in the same chart, occupational therapy software with customizable assessment forms saves a lot of duplicated typing.
The test was validated in community-dwelling older adults, yet it gets used far beyond them. Each group comes with a caveat worth knowing before you interpret a score:
Younger athletes are a special case. Compare them against the 20 to 40 year range, never the geriatric cut-offs. Balance data also earns a place in clearance decisions, which is where a structured return-to-running protocol puts it to work.
Three questions usually settle which tool to pick up:
In practice, the reach test and the Timed Up and Go pair well. Together they cover forward balance and walking in about 10 minutes. When single-leg control is the concern, add the stork balance test, a timed one-leg hold that needs only a stopwatch. APTA guidance points the same way: lean on several validated measures rather than one, because no single test carries the whole picture.
Knowing the limits keeps you from over-reading a good score:
A short reach also never tells you why. When the history points to dizziness rather than weakness, vestibular work such as caloric testing answers a question this test cannot.
Improving the score means improving forward postural stability. These categories all have support in the fall prevention literature, and all belong in a supervised program.
Before you blame the trunk for a short reach, check the ankle. A knee-to-wall test takes a minute and often explains the score. Frame all of this as fall prevention rather than test practice, because the aim is stability that carries over to the stairs at home.
Documentation does two jobs here. It gives you a defensible clinical record, and it shows a payer why therapy should continue. Both need more detail than a single averaged number. Strength screens are no different — interpreting infraspinatus testing also hinges on recording position and resistance, not just the grade.
Record all of the following, every time:
In a SOAP note, the trial distances belong in the objective section. The risk band and your interpretation belong in the assessment. Our guide to SOAP progress notes shows the same split applied across a course of care.
Billing follows the same logic. The initial score usually supports the evaluation you bill under CPT code 97161, and later scores support the case for continued visits. Vague entries are what reviewers question first.
Free-text boxes are where this falls apart, because completeness varies by clinician and by how busy the day was. Digital intake forms with a field per trial remove that variation. A physiotherapy clinic management system then keeps every score in date order for the progress review.

Most physical therapy and occupational therapy practices still record this test on paper or in a free-text box. That is fine for one visit. It falls apart when you need to see whether a patient has improved across eight of them.
Pabau, an all-in-one practice management system, handles the tracking for you. With measurements tracking, you build a field for each trial and the average calculates itself. Every session’s score lands on one chart, so the trend is already drawn when the progress review arrives.
The follow-up can look after itself too. With automated workflows, a score crossing the 6-inch line can trigger a falls prevention review, so it no longer depends on someone remembering. Scores also sit in the same record as appointments and notes in a physical therapy EMR, rather than in a spreadsheet nobody opens.
The payoff is time. Less of it spent rebuilding a history from paper, more of it spent on the balance work that actually shifts the score.
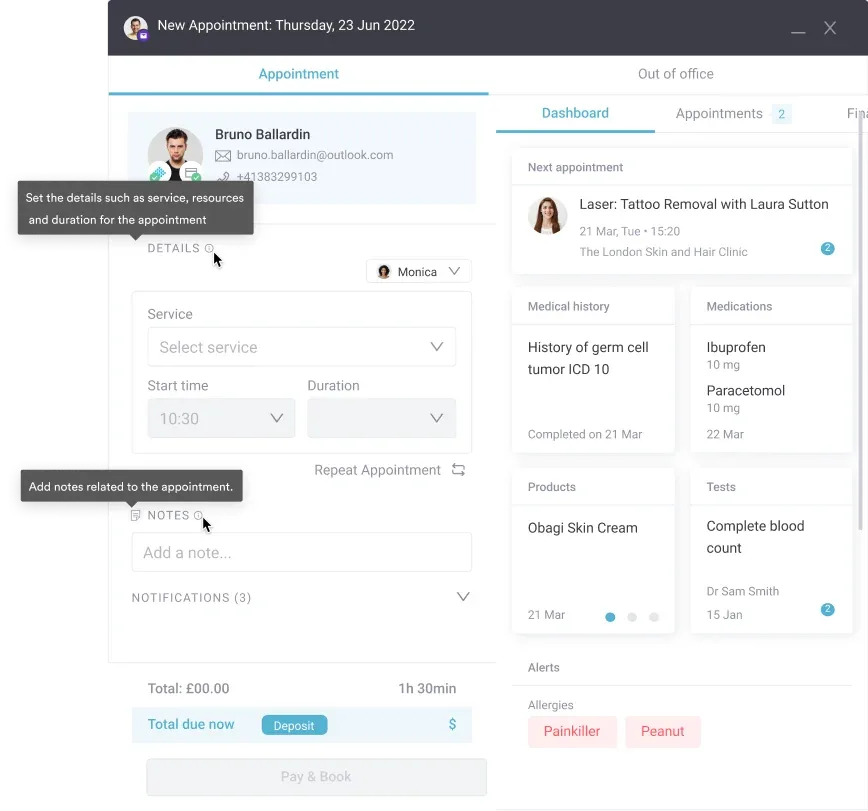

Build a structured reach test form, watch the trend chart itself, and let a falling score trigger the follow-up task automatically. No spreadsheets, no missing trials.

Non-fatal falls among older adults cost the US health system more than $80 billion in 2020, according to CDC estimates. Spotting the patient at risk before the fall is one of the highest-value five minutes in rehabilitation, and this test buys it cheaply.
The trade-off is discipline. A score is only as good as the setup behind it. Tape the foot position, keep the yardstick at the patient’s shoulder, and write down every trial. Do that and the number becomes evidence. Skip it and you have a figure nobody can defend.
Pick one thing to change this week. Standardize how your team records the test, then look at what the trend tells you a month later. Book a demo to see how Pabau keeps balance scores, notes, and follow-ups in one patient record.

Checking for a trapezius tear? Trapezius tear test gives a structured, repeatable assessment that separates a minor strain from a partial or complete tear.
Testing sensory function during the exam? Two-point discrimination test covers normal values by body region and how to grade a result.
Assessing a patient’s cardiovascular fitness? VO2 max testing measures how well the body responds to training, not just how hard it worked.
Is the shoulder limiting the reach? Shoulder range of motion gives you a structured place to record what you measured.
Need a gait speed template too? 10-meter walk test turns a short walk into an objective gait speed score for tracking mobility.
Most therapists retest every two to four weeks, then again at discharge. Retest sooner after a fall, a medication change, or a new report of dizziness. Any interval works, as long as the setup matches the first session exactly.
Yes, in most settings a trained assistant can run the trials, because the protocol is fixed and the measurement is simple. The evaluating therapist still interprets the score and signs the plan of care. State practice acts differ, so check yours first.
The 6-inch high-risk threshold is about 15 cm, and the 10-inch low-risk threshold is about 25 cm. Use whichever unit your notes already use, then stay with it. Switching units between sessions is a common source of false progress.
No. The multi-directional reach test is performed standing and measures four directions, forward, backward, right and left. The modified test is seated and measures three. Their norms are different, so keep the two sets of results apart.
Yes, provided they can stand safely for a minute without holding on. Move the walker clear and keep both hands off any support during the trials. If standing unsupported is not safe, use the seated version instead.