CRM for chiropractors: how to manage patients, bookings and marketing
A CRM for chiropractors is a patient relationship management system built around...

Last Updated: Oct 13, 2026

Cuboid syndrome is a partial dislocation of the calcaneocuboid joint, and it usually follows a lateral ankle sprain.
The cuboid syndrome test pairs a squeeze test with cuboid notch palpation, and it takes under two minutes.
A positive result reproduces the patient’s familiar lateral midfoot pain, not vague soreness across the whole foot.
Plain X-rays rarely show the subluxation, so a normal film does not rule cuboid syndrome out.
Rule out fracture before you attempt a cuboid whip, because manipulating a stress fracture makes it worse.
Six weeks after an ankle sprain, the patient is still limping. The X-ray came back clear. The ligaments feel stable on stress testing. Yet every step on the outer edge of the foot still hurts.
That pattern often points at the cuboid. A small shift at the calcaneocuboid joint keeps producing lateral midfoot pain long after the ligaments have healed. Because it rarely shows on imaging, it survives most standard ankle work-ups untouched.
The cuboid syndrome test is how you catch it. Two hands-on checks, run in sequence, tell you whether the cuboid is the pain source or a red herring.
Cuboid syndrome is a partial dislocation, or subluxation, of the calcaneocuboid joint. The cuboid shifts slightly out of its seat against the calcaneus. Patients usually describe a dull ache along the outer edge of the midfoot that sharpens under load.
It gets missed for one reason. The shift is small, so plain radiographs look normal, and a normal film ends most investigations. The Cleveland Clinic lists it among the more underdiagnosed causes of lateral foot pain for exactly that reason.
You may also see it written as cuboid subluxation or lateral midfoot syndrome. Before you can test for it, though, you need to know what sits under your thumb.
The cuboid is a wedge-shaped tarsal bone on the outer column of the foot. It meets four neighbors: the calcaneus behind it, the lateral cuneiform on its inner side, and the fourth and fifth metatarsals in front.
Underneath runs the peroneus longus groove. That groove matters more than any other landmark here. The tendon passing through it is what drags the cuboid out of position during an inversion sprain.
A lateral ankle sprain is the most common trigger. As the foot rolls in, the peroneus longus pulls the cuboid downward and inward, and the joint loses its normal seat. A Sports Health review names this as the primary mechanism.
Athletes see it more often than most groups. Roughly 4% of athletes reporting foot problems have symptoms coming from the cuboid, and dancers, runners, and court-sport players lead that count. Repeated peroneal traction can produce the same shift with no single dramatic injury behind it.
Flat feet and hypermobile joints raise the risk further. So for physical therapy practices handling a steady stream of ankle sprains, this test earns a permanent slot in the assessment protocol.
Five findings raise your pre-test probability enough to justify a full examination.
Put those together and a picture forms. Someone sprained an ankle two to eight weeks ago, still hurts along the outer foot, and has a clean X-ray. Test that foot.
The cuboid syndrome test is two procedures run back to back: the cuboid squeeze test, then cuboid notch palpation. Neither needs equipment. Together they give you far more confidence than either does alone.
The squeeze test is your primary provocation test, and the order of operations matters more than the force you use.
Published sensitivity and specificity figures for this test are thin. Treat a positive as supporting evidence, not as proof on its own.
Palpation is what separates the cuboid from the peroneal tendons, which hurt further back along the outer ankle.
When the first two checks disagree, two more provocation tests can break the tie.
Neither one stands alone as a diagnosis. They are tie-breakers, and each costs about 15 seconds. If the foot’s alignment looks driven from the forefoot instead, the Coleman block test helps you work out where the deformity comes from.
That last one causes most of the trouble. Ask the patient to compare the provoked pain against their everyday pain before you write down a positive.
The same distinction applies to wrist tendon testing, where a positive Eichhoff’s maneuver has to be told apart from a positive Finkelstein result.
A positive squeeze test plus point tenderness at the cuboid notch, in a patient whose history fits, is strong evidence of subluxation. Read the two results together rather than in isolation.
Look closely at that third row. Tenderness without a positive squeeze usually means the pain sits in soft tissue rather than the joint itself.
Before you treat, rule out the conditions that copy this presentation. The table below shows what separates each one at the bedside.
Foot pain also travels, so keep your net wide. Heel and arch pain that bites on the first steps of the morning belongs to the windlass test instead. Calf symptoms after a hard push-off call for the Thompson test.
Order imaging to exclude other diagnoses, not to confirm this one. Plain X-rays miss cuboid subluxation because the displacement is small and the joint space reads poorly on standard views. A normal film changes nothing about your clinical findings.
For most patients, your clinical examination is enough to start conservative treatment straight away.
Once the test points at subluxation and fracture is off the table, the cuboid whip is the primary treatment technique. Most patients feel the difference within seconds of a well-executed thrust.
Perform the cuboid whip only after fracture has been excluded clinically or on imaging. A missed stress fracture or Jones fracture gets significantly worse under manipulation. If you are in any doubt, image first.
Manipulation gets the joint back. The following two weeks decide whether it stays there. Most physical therapy protocols combine taping, orthotic support, and a graded return to load.
Low-Dye taping applied straight after the whip helps hold the cuboid in its reduced position. Run the tape from the fifth metatarsal head, under the plantar surface, and anchor it on the inner midfoot. A cuboid pad then takes over, offloading the joint during weight-bearing.
Send the patient home with something specific to do. A written home exercise program covering peroneal strengthening and balance work keeps things moving between visits. That habit matters most in manual therapy settings such as chiropractic and osteopathy practices. Hands-on work only holds if the patient loads the foot properly in between.
Athletes need more than pain-free walking. A dancer carrying 10% residual lateral foot pain still has a performance problem. So the standard for clearance sits higher than it does for the general population.
Return to sport usually runs in three phases. This return-to-running protocol gives you a framework you can adapt for cuboid cases.
Prevention comes down to three things: proprioception work, peroneal strength, and orthotic control of pronation. Get those in place and recurrence drops sharply.
Structured outcome measurement is rare in cuboid syndrome, and that is a missed opportunity. Scores taken from the first visit give you a recovery baseline and something concrete to show the patient at week three.
None of this helps if the scores live on paper. Practices that record them as tracked outcome measures can see the trend across appointments instead of hunting through old notes. The same goes for any scored tool you already run, from the Harris Hip Score to a simple pain scale.
In most practices today, a cuboid assessment lands in free text. One clinician’s shorthand records the squeeze test, another writes up the taping differently, and the outcome score sits on a paper form in a drawer. Six weeks later, nobody can say whether the pain genuinely improved.
Practice management software like Pabau replaces that with structured templates. You build the cuboid assessment once, and every clinician then records the same fields in the same order. Pabau’s physical therapy EMR is what keeps that template format consistent once every clinician starts using it.
Digital intake forms collect prior sprains and sport participation before the patient arrives, so the first appointment starts with the history already in hand.
Everything lands in one client record, alongside photos, consent, and outcome scores. For physical therapy practices handling high ankle-sprain volumes, that means audit-ready notes without anyone typing the same thing twice.
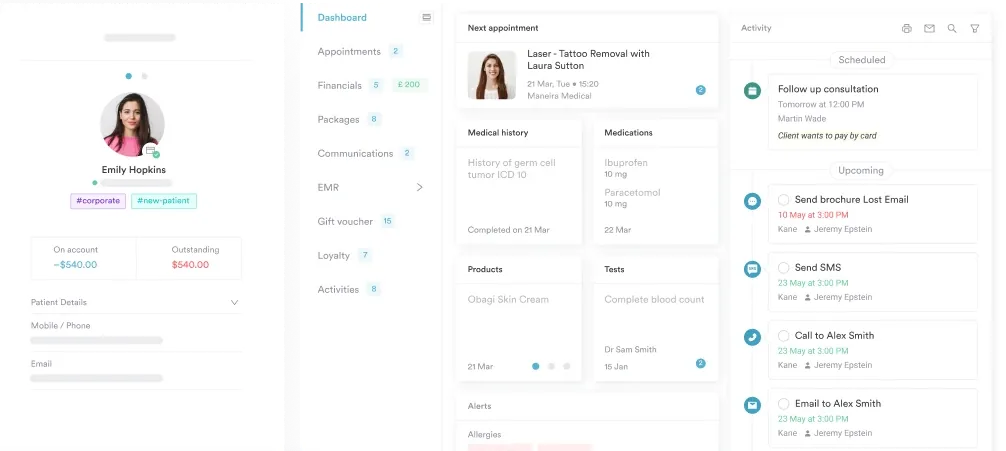

Practice management software like Pabau gives your team structured assessment templates, SOAP notes, and outcome scores in one client record. Every clinician records the same fields, so follow-ups start with the full picture.

Lateral foot pain that lingers after an ankle sprain deserves two more minutes of examination. The squeeze test and cuboid notch palpation cost almost nothing to run. Either one can redirect a rehabilitation plan that has stalled for weeks.
The trade-off worth remembering is that this test carries a treatment decision behind it. A positive result points toward manipulation, and manipulating an unexcluded fracture does damage. Clear the fracture first, then act on what you found.
Consistent documentation is what turns a good examination into a reliable recovery record. Book a demo to see how Pabau structures MSK assessments, outcome scores, and follow-up appointments in one place.

Need to work out where a foot deformity comes from? Coleman block test shows you how to separate forefoot-driven from hindfoot-driven alignment problems.
Screening lower-limb control before clearance? Lateral step down test covers the scoring criteria and what each fault tells you about movement quality.
Looking for another weight-bearing provocation test? Duck walk test walks through the technique and the findings that justify further imaging.
Grading effort during a graded return to load? Borg RPE scale gives you a simple way to record exertion at every rehab session.
Clearing a court-sport athlete for full training? Yo-yo intermittent recovery test sets out the protocol and normative scores for repeated high-intensity work.
Most patients improve within one to four weeks once the joint has been reduced and supported. Relief often starts immediately after a successful cuboid whip. Long-standing cases, or those sitting on top of flat-footed mechanics, take longer and usually need orthotic correction to hold the result.
Yes, and most people do, which is part of why the condition drags on. Walking stays possible but uncomfortable, with the pain sharpest at push-off. Continued loading keeps irritating the joint, so cutting impact activity for one to two weeks is worth the short-term inconvenience.
Rest, ice, and supportive footwear all help, but the manipulation itself should never be attempted at home. A cuboid whip performed on an undiagnosed fracture can cause serious harm. Patients can safely do the strengthening and balance work once a clinician has confirmed the diagnosis.
Recurrence is common when the underlying mechanics go unaddressed. Pronated or hypermobile feet keep loading the peroneus longus, which pulls the cuboid out of position again. Orthotic support, peroneal strengthening, and proprioception training are what stop the problem returning.