Postural assessment: Free template and step-by-step guide
A postural assessment is a structured clinical evaluation of how a patient’...

Last Updated: Oct 13, 2026

Thoracic outlet syndrome exercises target nerve decompression, postural correction, and scapular stability, not pain relief alone.
Neurogenic TOS accounts for roughly 95% of cases, which makes stretching and nerve gliding the most commonly prescribed interventions.
Movements to avoid include heavy overhead lifting, the behind-the-neck press, and upright rows, all of which worsen outlet compression.
A phased approach beats random exercise selection. Pain reduction comes first, then mobility, then strengthening, then function.
Practice management software like Pabau helps physical therapy practices document exercise protocols, automate recall, and track TOS caseloads.
Thoracic outlet syndrome exercises are the first-line treatment for the nerve compression, arm pain, numbness, and shoulder tension that define this condition.
The program runs in four phases: pain reduction, mobility, strengthening, then a return to full function. Scalene and pec minor stretches, chin tucks, scapular retraction, and brachial plexus nerve glides carry most of the work. Overhead pressing and upright rows are the two movements that most reliably set a patient back.
A scoping review in PMC describes that conservative approach, but it found no randomized trials, so the supporting evidence rests largely on clinical opinion. Treat the week ranges below as a guide, because published protocols vary.
This guide covers each phase in turn, plus the movements that make symptoms worse. It also sets out when a patient should be sent for specialist review.
Thoracic outlet syndrome exercises are a structured set of stretches, strengthening movements, and neural mobilization techniques. They decompress the space between the collarbone and first rib, where nerves, arteries, and veins pass through. According to the National Institute of Neurological Disorders and Stroke, TOS occurs when those neurovascular structures become compressed.
The usual result is pain, numbness, tingling, and weakness in the arm, shoulder, and hand. Most people who present to a physical therapist with TOS are good candidates for conservative, exercise-based management. That is the first-line treatment, well before surgery enters the conversation.
The three types of TOS have different clinical presentations, but exercise protocols overlap significantly across all three.
Important note on vascular TOS: arterial and venous TOS carry a higher risk of complications. Patients with sudden arm swelling, skin discoloration, or a cool, pale limb should not begin exercise programs without specialist clearance.
The exercise protocols in this guide are written for neurogenic TOS, which is the vast majority of cases seen in physical therapy. Screen for vascular red flags before you start anyone on a conservative exercise plan.
Stretching targets the muscles that narrow the thoracic outlet, mainly the scalenes, pectoralis minor, and cervical musculature. Tight scalenes are one of the most consistent findings in neurogenic TOS, and releasing them reliably reduces brachial plexus compression. Start each session with these stretches before progressing to strengthening.
The scalene stretch directly targets the anterior and middle scalene muscles that form the posterior wall of the thoracic outlet. Tightness here compresses the brachial plexus between the scalenes and first rib.
Common error: hiking the opposite shoulder. Keep it pressed gently down throughout the stretch to maximize the scalene elongation.
The pec minor attaches to the coracoid process of the shoulder blade and can compress the brachial plexus when shortened. Forward-rounded posture, common in desk workers, is a primary driver of pec minor tightness and TOS symptom onset.
Forward head posture elevates the first rib and tensions the scalenes, narrowing the costoclavicular space. Cervical retraction corrects this at the source.
This one is safe enough to repeat several times a day. It works at a desk, in a car, or between patients at the practice.
Stretching alone is rarely enough. Scapular stabilizers need to be strong enough to hold the shoulder girdle in position all day. That means the middle and lower trapezius, plus the rhomboids. Weakness here lets the scapula tip forward, which re-tightens the pec minor and recreates the compression.
Scapular retraction, or shoulder blade squeezes, trains the middle trapezius and rhomboids to counteract the forward-rounded posture behind most neurogenic TOS.
Avoid shrugging the shoulders upward during the squeeze. The movement is purely horizontal. Pull the blades in toward the spine, and keep the shoulders down away from the ears.
Stiffness in the thoracic spine forces the neck and shoulders to compensate, increasing scalene load. A foam roller mobilization opens thoracic extension and reduces that compensatory tension.
Stop if this causes sharp pain in the neck or radiation into the arm. Patients with osteoporosis should seek clinician guidance before using a foam roller on the thoracic spine.
Nerve gliding exercises, also called neural mobilization or nerve flossing, move the brachial plexus through its full range inside the surrounding tissue. The movement stays slow and within a pain-free range.
When nerves become adhered or compressed, they lose their glide. That is what produces the burning, electric, or deep aching quality of neurogenic TOS, and what separates it from simple muscle tightness.
Upper limb nerve glide (median nerve focus):
If this reproduces your typical arm symptoms in a mild, recognizable way, that is normal. If it triggers sharp or severe pain, stop immediately and consult a physical therapist. Nerve glides performed incorrectly can aggravate neurogenic symptoms, which is why supervision matters in the early stages.
Similar arm symptoms can also come from an inflamed nerve rather than a compressed one, and brachial neuritis exercises follow a different progression. Confirm which picture you are treating before you prescribe a glide.
Diaphragmatic breathing addresses a less obvious contributor to TOS. When someone breathes mostly through the chest, the scalenes and sternocleidomastoid take over as accessory respiratory muscles and end up overworked. Over time that drives scalene hypertrophy and shortening, which compresses the thoracic outlet directly.
Retraining breathing mechanics may reduce that load. The supporting evidence is mechanistic reasoning and small studies, not large randomized controlled trials.
Home exercise adherence separates the patients who resolve in 6-8 weeks from those who plateau. Practice management software like Pabau sends exercise reminders between visits, on whatever schedule you set. Patients log their own compliance before the next appointment, so you walk in already knowing what happened.
Sequencing carries as much weight as the exercise selection itself. The general clinical framework below runs in four progressive phases, from settling symptoms to loading the shoulder girdle under normal demands.
Published rehabilitation timelines vary widely and no consensus protocol exists, so the week ranges below are approximate. Loading the shoulder girdle before pain settles and mobility returns is one of the most common reasons patients plateau early.
Progression between phases depends on symptom response, not the calendar. A patient who completes their home program consistently may move faster. A patient with significant neural irritability may spend extra weeks in Phase 2 before the shoulder girdle gets loaded at all.
Certain movements mechanically close the thoracic outlet or load the scalenes and brachial plexus in ways that reliably worsen compression. Understanding why they cause problems helps patients make better decisions when they go back to the gym on their own.
Grouped side by side, the dividing line is mechanical. What decides a movement is whether it narrows the costoclavicular space or frees it, and the chart below sets the two columns against each other.
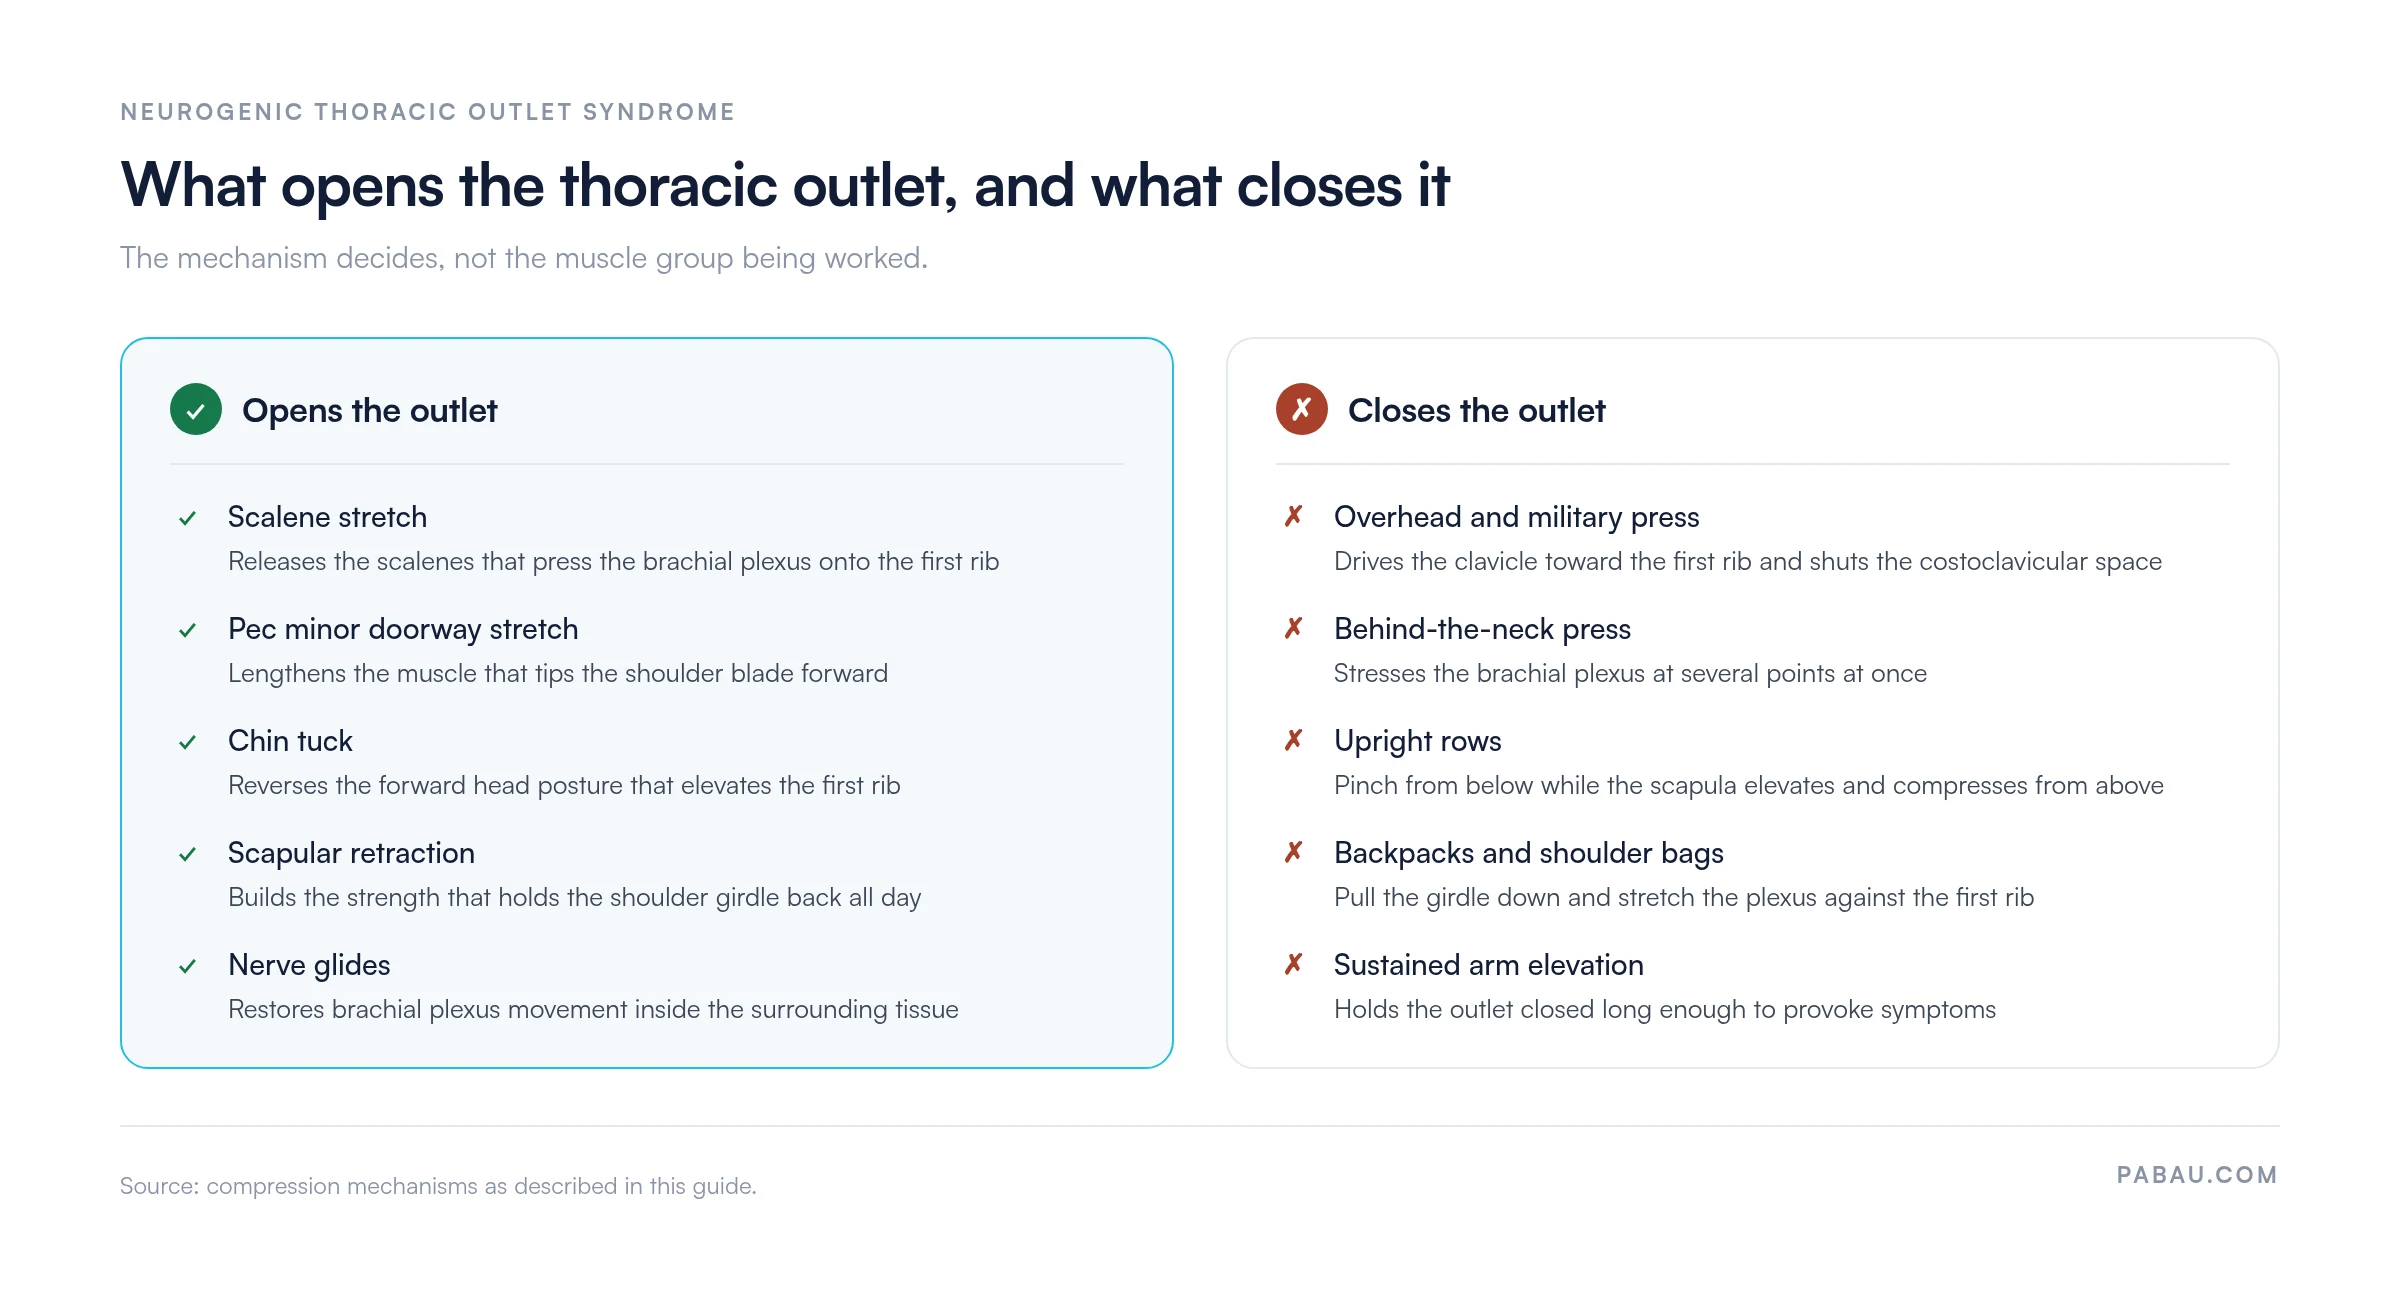
Treat these as general guidance, since few of them are absolute contraindications. Someone in Phase 4 with full symptom resolution may tolerate modified overhead work under supervision. Record the restriction on the patient’s chart either way, so every clinician who sees them works from the same list.
Physical therapy for TOS goes well beyond handing over a sheet of exercises. A qualified therapist brings diagnostic precision and hands-on manual therapy, then modifies the program as the patient’s presentation changes. The American Physical Therapy Association treats structured conservative management as the standard of care for neurogenic TOS.
What a physical therapy session for TOS typically involves:
Provocative testing anchors the whole plan. A structured Adson’s test record gives you a baseline you can reproduce at every reassessment. The exercises themselves travel home with the patient, so issue them as a written home exercise program rather than a verbal instruction.
Practices running an established musculoskeletal caseload manage TOS patients across multiple appointments spanning 8-12 weeks. Scheduling, consistent records of exercise progression, and patient communication between visits all have to hold together across that stretch.
Conservative thoracic outlet syndrome exercises reduce or resolve symptoms in most neurogenic TOS patients. Some presentations still need medical or surgical evaluation rather than a home exercise program.
Seek urgent medical attention if you notice:
A neurogenic TOS patient who follows a structured protocol for 10-12 weeks without meaningful improvement should be referred on. A vascular or thoracic surgeon can order further imaging, such as MRI or CT angiography, and assess whether surgical decompression is warranted.
Referral at that stage is the expected next move once physical therapy has been applied fully and correctly. Document what was tried, for how long, and what the reassessment scores showed, so the surgical team has the history.
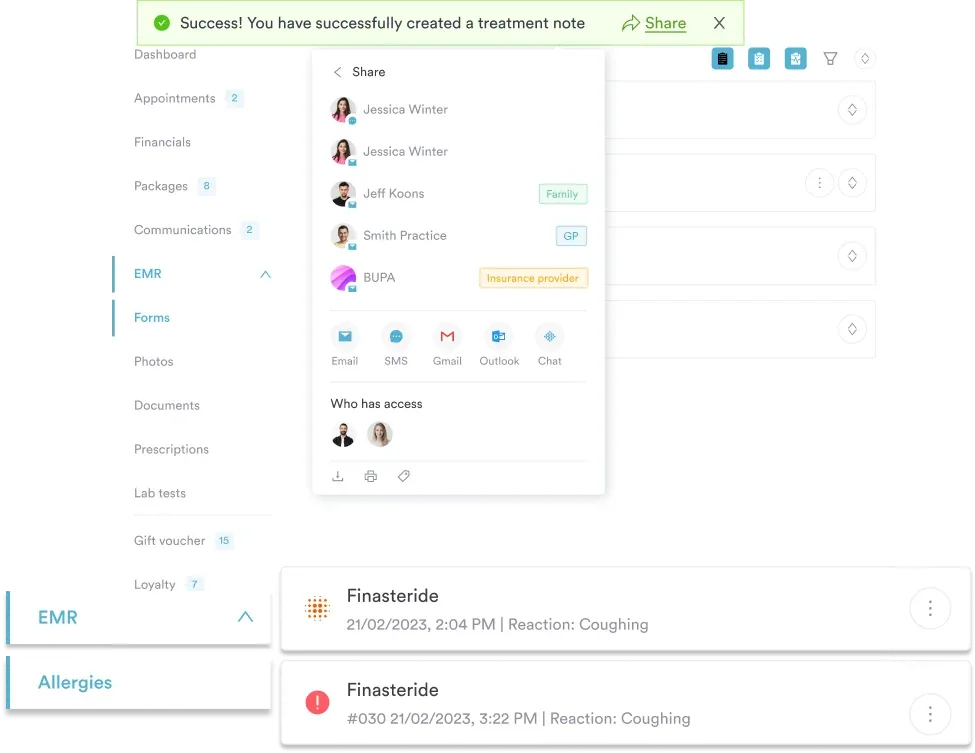
A 10-12 week TOS rehabilitation program means multiple appointments, phased exercise progressions, changing contraindication lists, and regular contact between visits. For a practice carrying 15-30 TOS patients at once, that is a heavy administrative load on top of clinical care. An EMR for physical therapists takes most of the friction out of it.
Pabau carries that load in four places:
Every Pabau subscription includes every feature, so a solo therapist and a five-site group work from the same toolset. Onboarding is structured and guided, so your protocols and forms are in place before the first patient is booked in.

Pabau gives physical therapy and musculoskeletal practices one place to document exercise protocols, automate follow-up between visits, and track progress across a 12-week rehabilitation episode.

Thoracic outlet syndrome exercises work when they follow a deliberate order. Reduce pain, restore mobility, build scapular stability, then reintegrate function. Pick each movement from the phase the patient is actually in, and the week-six plateau largely stops happening.
The trade-off worth remembering is patience. Phase 2 lasts as long as the nerve needs to settle, and pushing into strengthening early costs more time than it saves.
If you run a physical therapy or musculoskeletal practice, the documentation and follow-up around a 12-week protocol is where the hours go. Book a demo to see how Pabau keeps exercise plans, progress notes, and patient reminders in one record.

Working through the provocative tests for TOS? Wright’s test walks through the positioning, what counts as a positive finding, and how to record the result.
Treating neck involvement alongside the outlet? Neck pain exercises covers the cervical work that sits underneath most TOS presentations.
Running a physical therapy practice and want to tighten compliance? Mandatory compliance for physiotherapy clinics covers the documentation and regulatory requirements PT practices need to meet.
The best thoracic outlet syndrome exercises are the scalene stretch, pectoralis minor stretch, scapular retraction, cervical retraction, nerve gliding, and diaphragmatic breathing. These target the three primary drivers of thoracic outlet compression: scalene tightness, pec minor shortening, and scapular instability. Begin with stretching and breathing before progressing to strengthening.
Avoid heavy overhead pressing, behind-the-neck press, upright rows, and sustained arm elevation above shoulder height. These movements mechanically close the thoracic outlet or load the brachial plexus against adjacent structures. Heavy backpacks and shoulder bags that pull the shoulder girdle downward should also be avoided.
Yes, the wrong exercises can worsen TOS. Overhead lifting, upright rows, and exercises that require sustained shoulder elevation above 90 degrees increase compression in the costoclavicular and scalene triangle spaces. Nerve gliding exercises performed too aggressively or with incorrect technique can also aggravate neurogenic symptoms. Work with a physical therapist to ensure your exercise program is correctly phased.
Yes, the majority of neurogenic TOS cases resolve with conservative management. Structured physical therapy with a phased exercise protocol addressing stretching, strengthening, and nerve mobilization is the first-line treatment. Surgery is reserved for cases that do not respond to 10-12 weeks of correctly applied conservative care. It is also used for vascular TOS with arterial or venous compromise.
Most patients notice measurable symptom reduction within 4-6 weeks of consistent exercise practice. Full resolution typically takes 8-12 weeks of structured physical therapy, though patients with significant neural irritability or longstanding postural dysfunction may require longer rehabilitation. Consistency with daily home exercise completion is the single strongest predictor of positive outcome.
Many TOS exercises are safe for home practice once a physical therapist has taught them correctly. Chin tucks, scalene stretches, pec minor stretches, scapular retractions, and diaphragmatic breathing can all be performed independently. Nerve gliding exercises should initially be supervised to ensure correct technique before transitioning to a home program.