GLP-1 diet plan
A GLP-1 diet plan is a structured eating framework for patients taking semagluti...

2
Last Updated: Oct 13, 2026

The squish test is a manual pelvic compression provocation test used to assess sacroiliac joint dysfunction and pelvic ring integrity.
A positive result reproduces familiar pain in the SI joint or groin. It doesn’t confirm a diagnosis alone, so use it as part of a test cluster.
Common errors include incorrect hand placement and failure to distinguish provoked local pain from referred pain, which distorts your findings.
Pabau’s SOAP-style clinical notes let you standardize squish test documentation across your team, capturing pain location, VAS score, and force applied in one structured record.
A sacroiliac joint diagnosis depends on including a dedicated pelvic provocation test in the examination sequence. The squish test is one of the fastest tests to add to that sequence.
The squish test is a manual pelvic compression provocation test. The clinician applies anterolateral-to-posteromedial force across the iliac crests while the patient lies supine, stressing the sacroiliac joint and anterior pelvic ligaments. A positive result reproduces the patient’s familiar pain in the SI joint region or groin, suggesting sacroiliac joint dysfunction or pelvic ring compromise.
The name is informal but the mechanism is precise. By compressing the iliac wings toward each other, the test gaps the posterior SI joint and loads the anterior ligamentous structures. That directional stress is what differentiates it from tests that distract or rotate the pelvis.
This guide covers what a practicing clinician needs: indications, technique, result interpretation, published diagnostic accuracy data, comparison with related tests, common errors, and documentation. Only qualified clinicians should perform this test. It is not a self-administered procedure.
The squish test earns its place in the examination when the clinical picture points toward pelvic or sacroiliac pathology. Using it indiscriminately adds noise. Using it selectively adds diagnostic signal.
Consider adding the squish test when a patient presents with any of the following:
Contraindications are equally important. Do not perform the squish test if there’s a known or suspected acute pelvic fracture, active osteoporosis with high fragility fracture risk, or confirmed pregnancy. This applies especially in the second and third trimester. Stop the test immediately if severe pain, neurological symptoms, or cardiovascular instability arise during application.
Physiotherapists, chiropractors, osteopaths, orthopedic surgeons, and emergency physicians all use the squish test, depending on scope of practice and clinical setting. For guidance on which assessments fall within your professional scope, the American Physical Therapy Association’s clinical practice resources provide a useful reference point. In the UK, the Chartered Society of Physiotherapy’s national evidence-based guidance covers musculoskeletal assessment standards.
Practitioners working in physical therapy or sports medicine settings will encounter this test most frequently, particularly in pelvic girdle pain and post-trauma triage pathways. Practitioners new to physiotherapy practice compliance requirements should note this. Documenting which tests were performed, by whom, and with what outcome is part of clinical governance.
Consistent technique is what makes provocation tests repeatable across clinicians and appointments. Vary the hand placement or force direction and you change what structure you are actually testing.
Apply force with your body weight transferred through straight arms, not by squeezing with your hands alone. This gives you more controlled, consistent pressure and reduces clinician fatigue across a full assessment session. If the patient flinches or tenses before you apply meaningful force, record that guarding artifact separately. It isn’t the same as a positive provocation.
Interpreting the squish test is not simply a binary pass/fail. The quality of the pain response matters as much as its presence.
A positive squish test increases clinical suspicion but does not confirm a diagnosis. The test must always form part of a broader examination strategy, not stand alone as a definitive finding.
Published data on the squish test’s diagnostic accuracy varies by study population and reference standard. The honest summary: it has moderate sensitivity for SI joint pain and lower specificity used in isolation.
In the context of sacroiliac joint assessment, individual provocation tests including the squish test typically show sensitivity of 40 to 69%. Specificity typically falls between 69 and 80%, depending on the study and reference standard used. These figures should be cited with caution because exact values differ across publications. Always refer to primary literature for the specific numbers you use clinically.
The most clinically important finding from the research literature is not about the squish test alone. Research published in Manual Therapy by Laslett and colleagues established a key finding. Using a cluster of three or more positive SI joint provocation tests substantially increases diagnostic reliability over any single test. The squish test is one valid member of that cluster, but it cannot carry the diagnostic load by itself.
For return-to-activity protocols in physical therapy, this matters practically: a single positive squish test should inform clinical reasoning, not trigger a diagnosis in isolation. Pair it with the Thigh Thrust, Distraction Test, and FABER as part of your standard pelvic provocation battery.
Understanding where the squish test fits in the broader toolkit matters. It stops clinicians from over-relying on it, and from dismissing it when it would add value. The Ottawa decision rules illustrate a useful principle: structured multi-test approaches outperform single-test clinical intuition for musculoskeletal triage. The same logic applies to the SI joint.
The squish test is the only test in this group that applies a medial compression vector. That makes it uniquely useful for stressing the anterior pelvic ligamentous complex, a structure the Thigh Thrust and Distraction tests do not directly target. Include it specifically when anterior SI ligament involvement is part of your differential.
Technique errors are what typically produce false positives, false negatives, and unreproducible findings across appointments.
These are the errors most likely to compromise your squish test results:
Practitioners working with populations at higher fracture risk, such as those at osteopathy practices or chiropractic practices, should treat pre-screening for contraindications as non-negotiable. APTA’s directory of evidence-based tests and measures is a useful starting point for reviewing established assessment standards.
Most clinical disagreements about provocation test findings come down to documentation, not clinical skill. Two clinicians can perform the same squish test at different appointments and reach different conclusions. The patient didn’t change. Neither clinician recorded the force applied, the patient’s position, or what “positive” meant in their notes.
Good squish test documentation captures the following six elements:
Structured SOAP notes are the standard vehicle for capturing this. Safer clinical note-writing practices recommend using templated fields for examination findings rather than free-text descriptions. Free text introduces variability across clinicians and makes audit trails harder to follow. Platforms that offer pre-structured SOAP note frameworks reduce documentation time while improving the completeness of the record.
Practice management software like Pabau turns this documentation standard into a repeatable clinical workflow.
Pabau’s clinical records module supports custom assessment templates. Practice managers can build a standardized pelvic provocation battery template that every clinician follows consistently. Digital intake forms can capture the patient-reported pain history before the appointment, giving clinicians the pre-test baseline they need before any provocation test begins. For chiropractic and musculoskeletal practices, having that baseline ready before the clinician enters the room saves time. That efficiency compounds across hundreds of appointments a year.
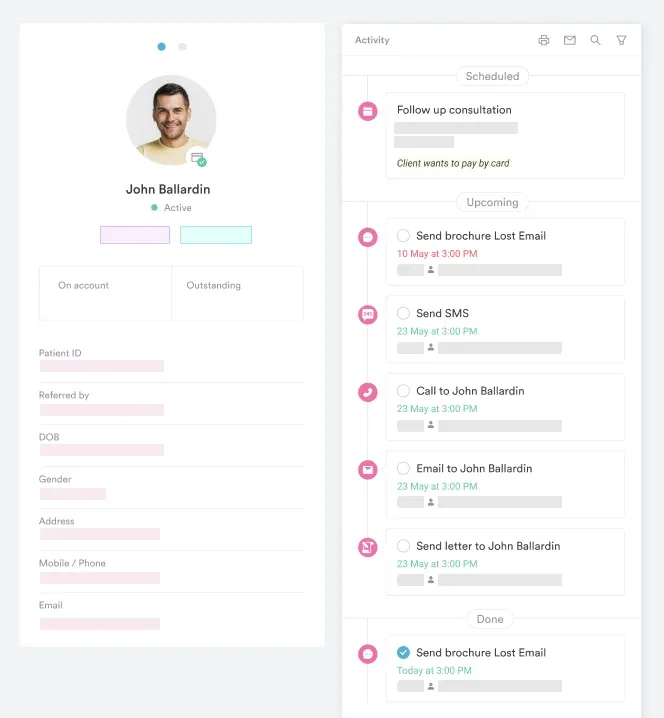

Pabau helps physiotherapists, chiropractors, and sports medicine clinicians capture structured clinical notes, track provocation test findings, and manage patient records across every appointment.

The squish test is a simple, low-cost, high-value addition to any pelvic examination sequence. Its specific contribution is stressing the anterior SI ligamentous complex via a medial compression vector. No other standard provocation test in the SI cluster achieves that in the same way. Used alone, its diagnostic accuracy is moderate at best. Used as part of a three-test or five-test cluster, it materially improves the clinical picture.
The clinicians who get the most from this test apply consistent technique and document findings in enough detail to reproduce the examination next time. They treat a positive result as a prompt to investigate further, not as a conclusion. If your documentation workflow makes that harder than it should be, structured clinical templates can help. Book a demo to standardize your provocation test records across every practitioner on your team.

Need a structured framework for safer musculoskeletal notes? Safer clinical notes covers documentation standards that reduce clinical risk across provocation testing and examination workflows.
Managing a physical therapy or chiropractic practice? Pabau’s pelvic health software is built for clinicians specializing in pelvic girdle pain, sacroiliac assessment, and post-natal musculoskeletal care.
Want to reduce documentation variability across your clinical team? Capture forms software lets you build standardized assessment templates that every clinician completes the same way, every time.
The squish test is a manual pelvic provocation test used to assess sacroiliac joint dysfunction and pelvic ring integrity. It applies anterolateral-to-posteromedial compression across the iliac crests to stress the anterior SI ligaments. This helps clinicians identify whether the SI joint is a source of the patient’s familiar low back, gluteal, or groin pain.
A positive squish test means the patient’s familiar pain was reproduced in the SI joint region or groin during compression. It suggests anterior sacroiliac ligament involvement or pelvic ring compromise, but it does not constitute a standalone diagnosis. Always combine it with additional provocation tests such as the Thigh Thrust and Distraction Test.
Used in isolation, the squish test has moderate sensitivity and limited specificity for SI joint pathology. Its reliability increases significantly when combined with two or more other SI joint provocation tests. Research by Laslett and colleagues in Manual Therapy supports a cluster approach as the most diagnostically robust method.
Only a qualified clinician should perform the squish test, within their scope of practice. This includes physiotherapists, chiropractors, osteopaths, orthopedic surgeons, and emergency physicians. It is not a self-administered test. In the UK, practitioners should follow guidance from the HCPC and CSP on musculoskeletal examination competency, depending on their qualification.
The squish test and the Finkelstein test assess entirely different structures. The squish test evaluates pelvic ring integrity and sacroiliac joint dysfunction via compression. The Finkelstein test assesses the first dorsal compartment of the wrist for De Quervain’s tenosynovitis. Both are pain provocation tests, but they share no anatomical overlap or clinical application.
The squish test supports the differential diagnosis of sacroiliac joint dysfunction, pelvic girdle pain, and anterior sacroiliac ligament pathology. In trauma settings, it can also flag pelvic ring fracture or instability. It is not diagnostic in isolation and should always be interpreted alongside full clinical history, imaging where indicated, and additional provocation testing.